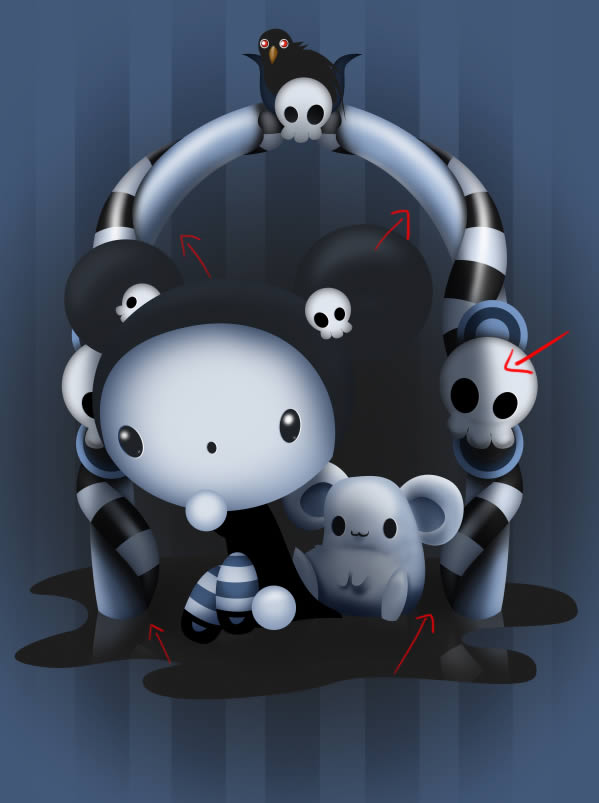
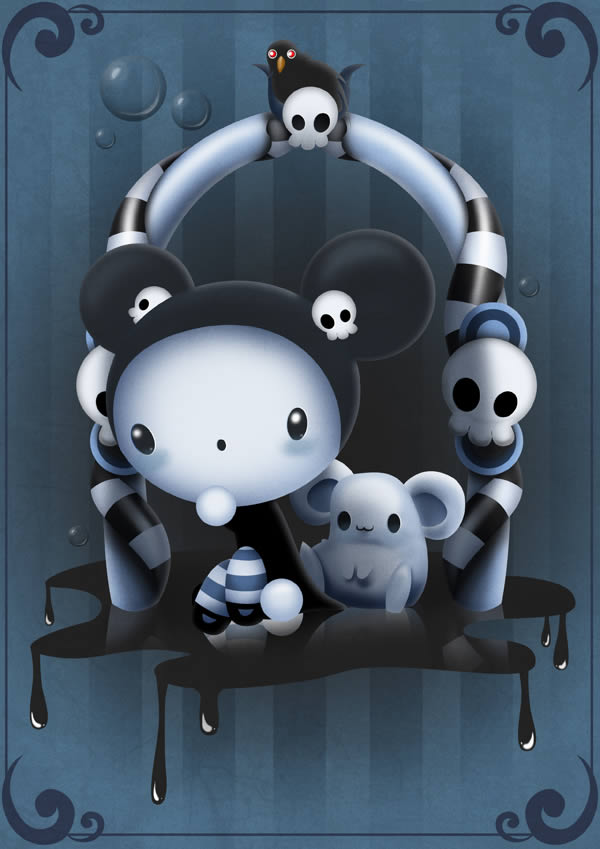
In this tutorial, we will explain how to create a cute and scary children’s illustration in Photoshop. Let’s get started!
Tutorial Assets
The following assets were used during the production of this tutorial.
Step 1
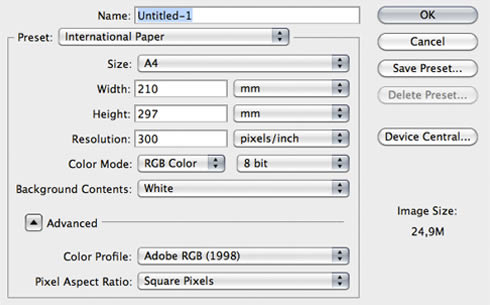
Create a New File by going to File > New (Command/Ctrl + N). In Preset select International Paper and in Size, A4.
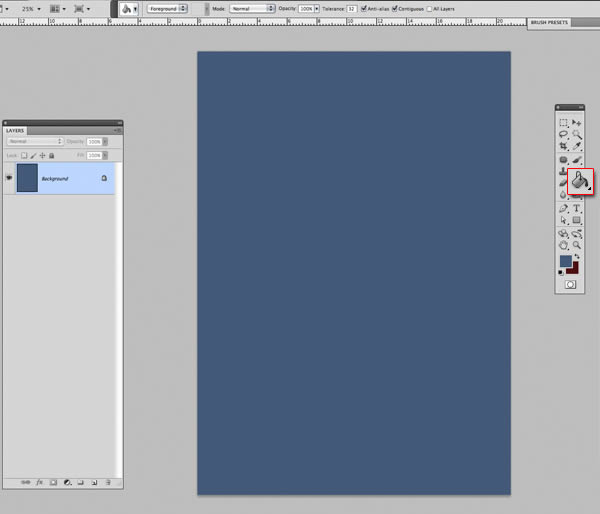
With Paint Bucket (G) and a bit darker and slightly desaturated blue, fill the Background Layer.
Step 2
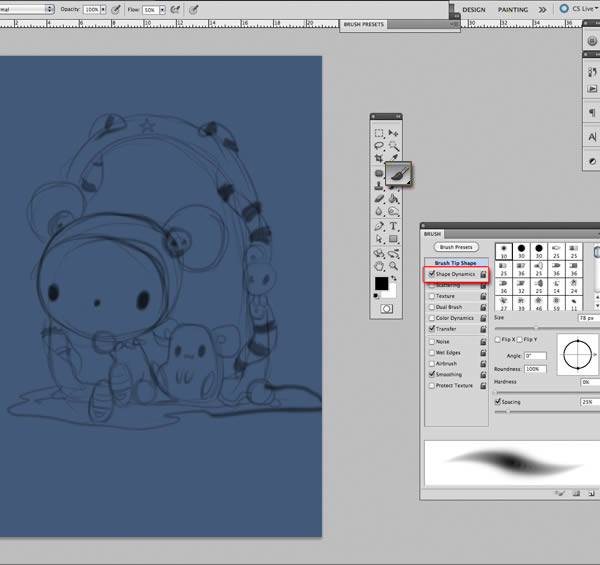
Add a new layer (Shift + Command + N). With the Brush Tool (B) with Pen Pressure activated mode and Transfer mode (optional), start doing the sketch that we will do.
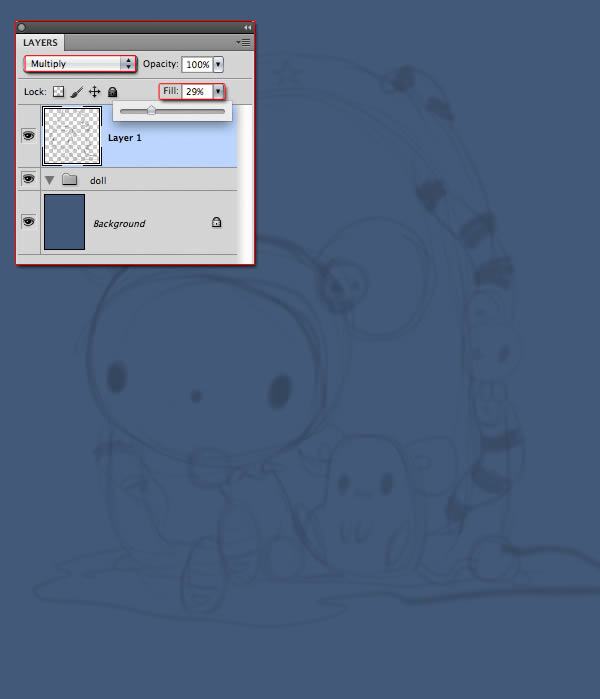
When finished, lower the Opacity of this layer to 29% and put it in Multiply mode. Below, create a new group and name it “doll”.
For this work will be important to create each group of items within folders, to maintain some order.
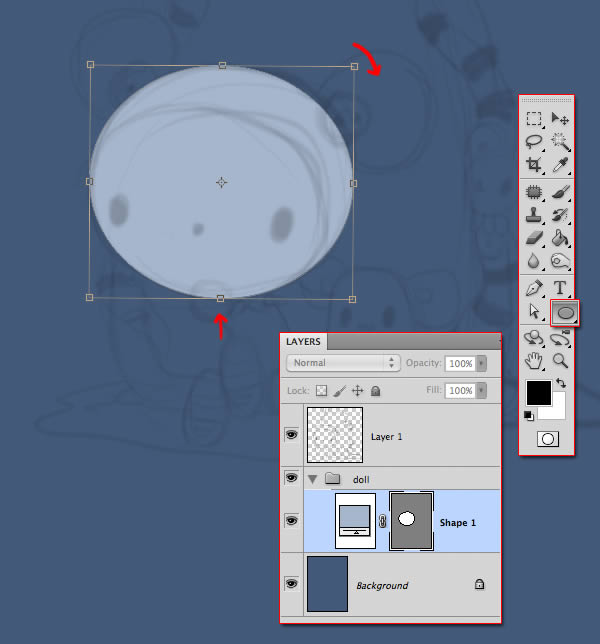
Step 3
Select the Ellipse Tool (U) to create the doll’s head. Give it a lighter blue than the background. Press Command + T and use the nodes to rotate it and adapt to the shape of the head.
Step 4
With the Pen Tool (P) draw the shape of the hat. With the Alt key, place the pointer between this layer and the one of the head and click to create a Clipping Mask.
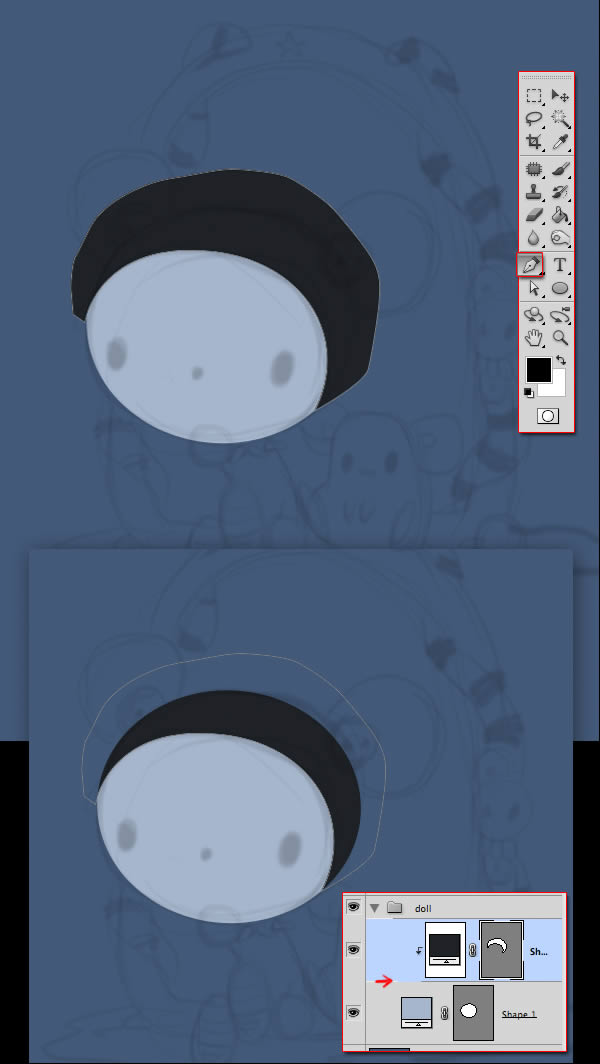
With the Direct Selection Tool (A) modifies the curves of the hat to soften and adapt them to the head.

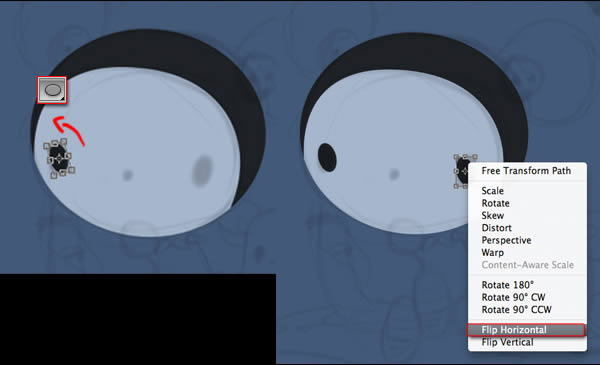
Step 5
To make the eyes, make an oval with the Ellipse Tool (U) with black color. Press Command + T and tilt it. Duplicate the oval by dragging it with Alt pressed and place it on its site. Click on it with the right button and select Flip Horizontal.
Step 6
Create two circles underneath the head. Above, creates a new group and call it “hair clip”. Make a circle of a slightly bluish white.
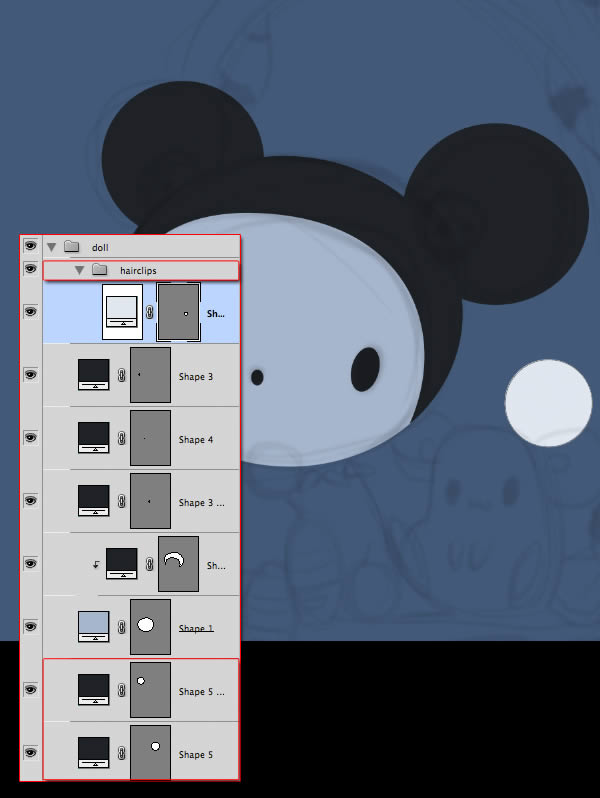
To make the teeth of the skull, first click on the Vector Mask Thumbnail to select the path. In the options of Pen Tool (P), select Add to Shape Area ( + ) so that everything you draw will be in the same layer. Use the Ellipse Tool (U) for the eyes and put them in a Clipping Mask in the skull.
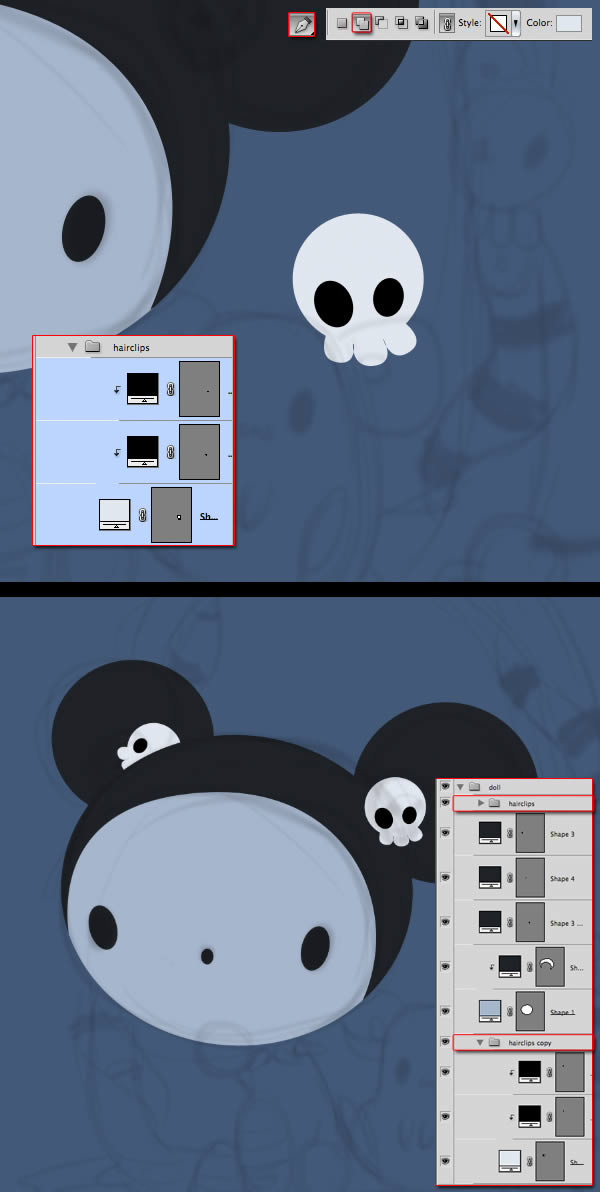
Select the group “hair clip” duplicate it and place it between the head and the circle of hair, rotate it and make it smaller to fit.
Step 7
Create a group underneath and name it “Body”. Draw the shape of the body. Remember that you can use the Direct Selection Tool (A) to fit the shape to the drawing.
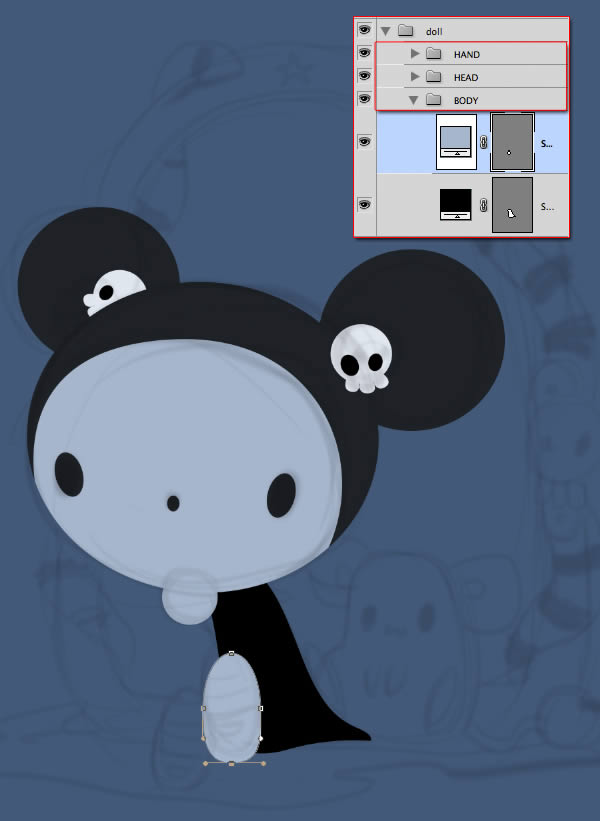
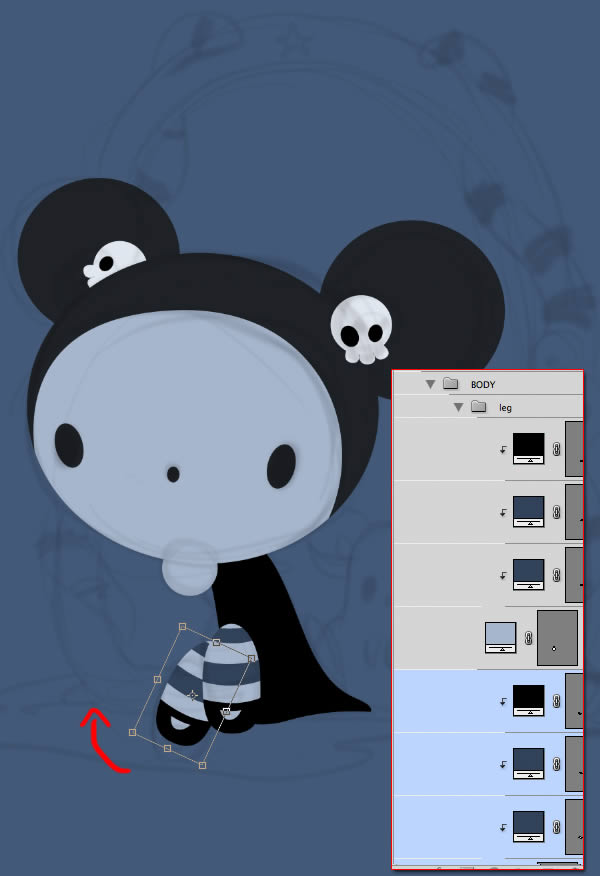
Create a group for the legs and using Clipping Mask, do the stripes and the shoe. Duplicate the layers, put them under and rotate them to locate the back leg.
Step 8
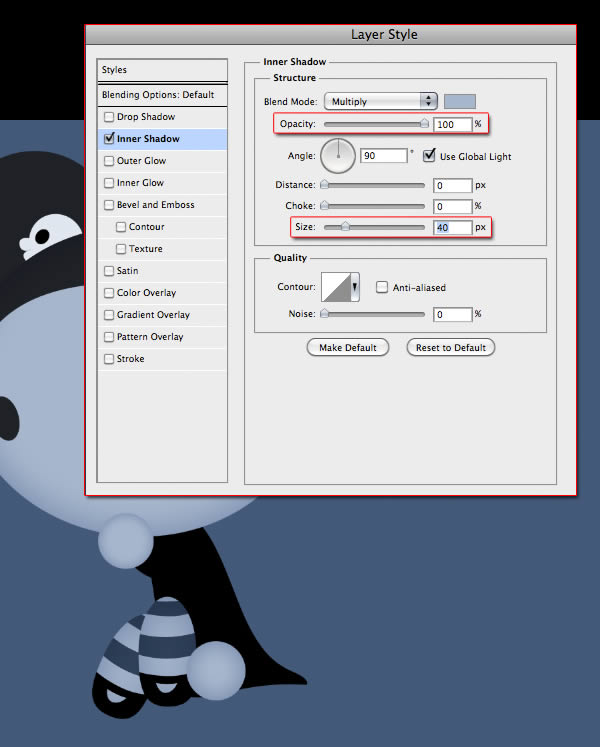
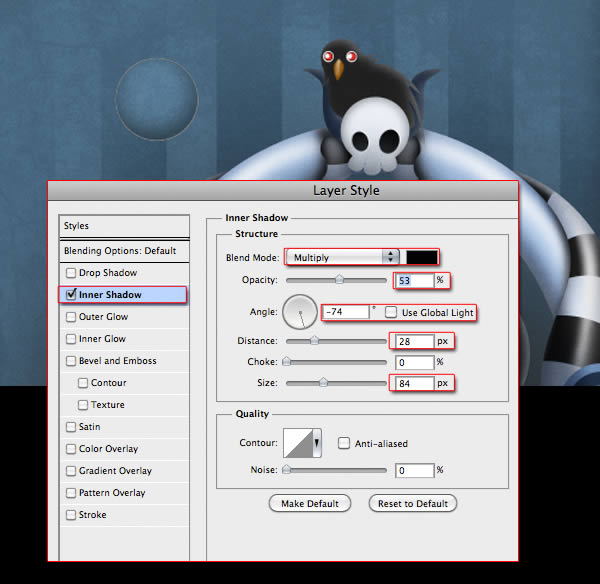
Let’s put some volume. Double click on the head to use the Layer Style. Select Inner Shadow, and choose a color equal to the face but a little darker. Set the rest of the options as in the image below.

Click the right mouse button and select Copy Layer Style. Select all layers of the same color and paste the options of Layer Style.
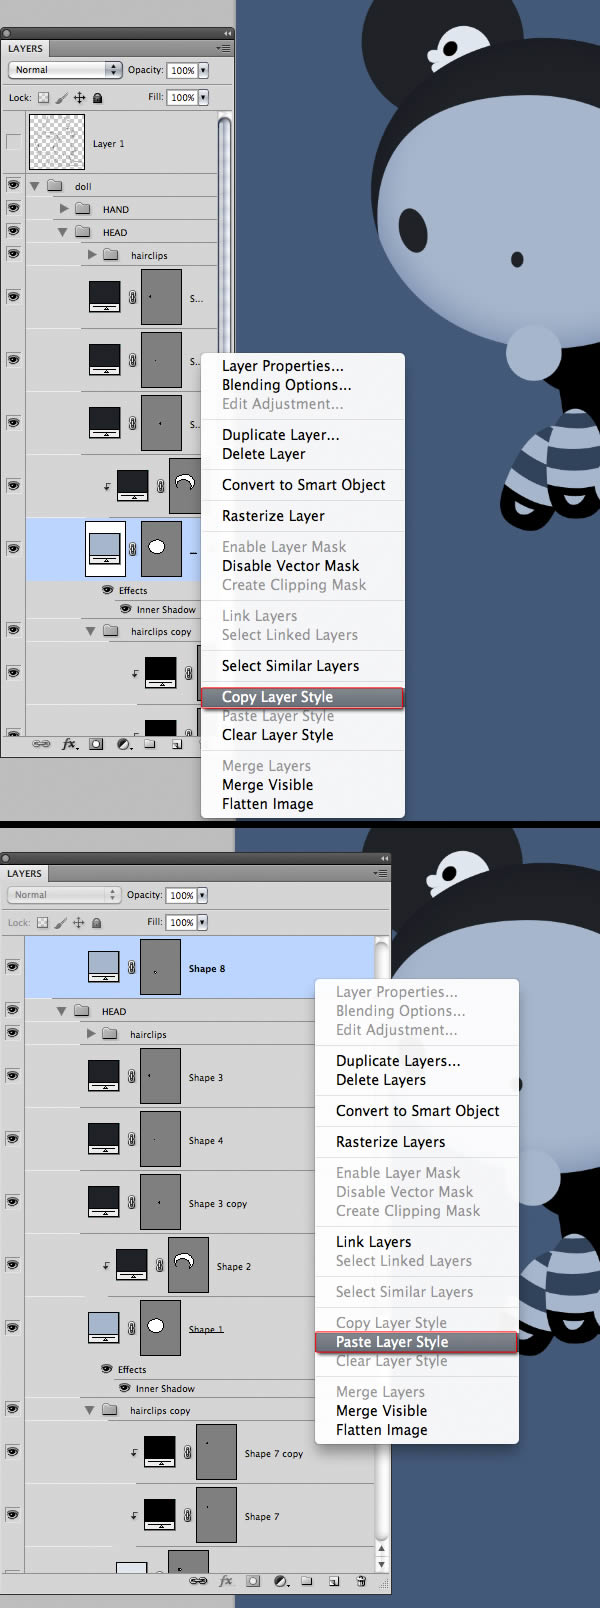
In some cases such as hands, you will need to go to the Layers Style options and change the size of the Inner Shadow to make it smaller.
Step 9
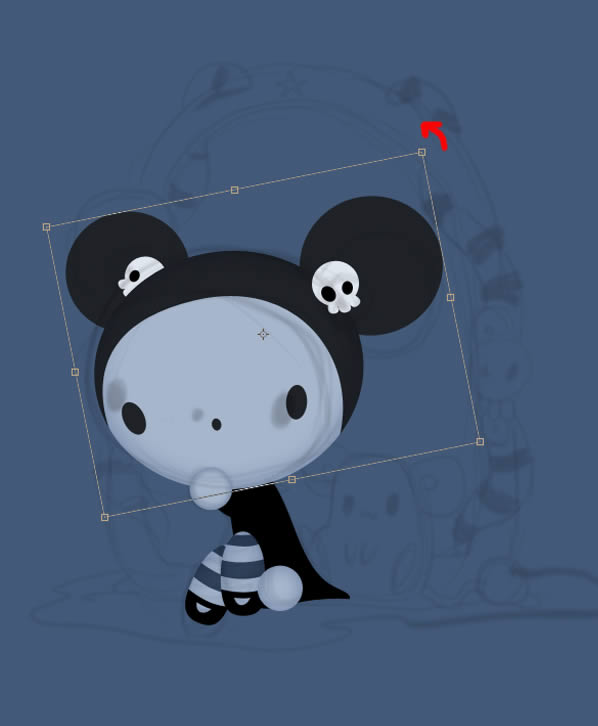
In this case, I do not like the inclination of the head so I select the group and turn it slightly using Command + T.
Step 10
Create a new group for the “mouse”. Draw all the parts separately as we did with the doll. I made the legs of another color, momentarily, to see them well.
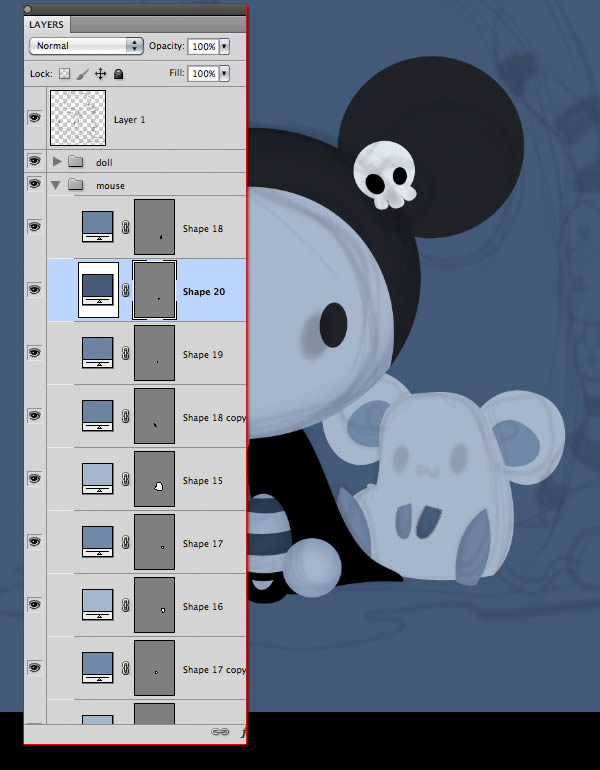
Draw the mouth using the Brush Tool (B) with a hard brush and Pen Pressure activated. If you don’t have a tablet, you can do it with the Pen Tool (P).
Step 11
Turn off the groups “doll” and “mouse” and creates a new group below for the arc. Press Command + R to view the document ruler and place a guide in the middle. Use the Pen Tool (P) and the Direct Selection Tool (A) to draw half the arc.
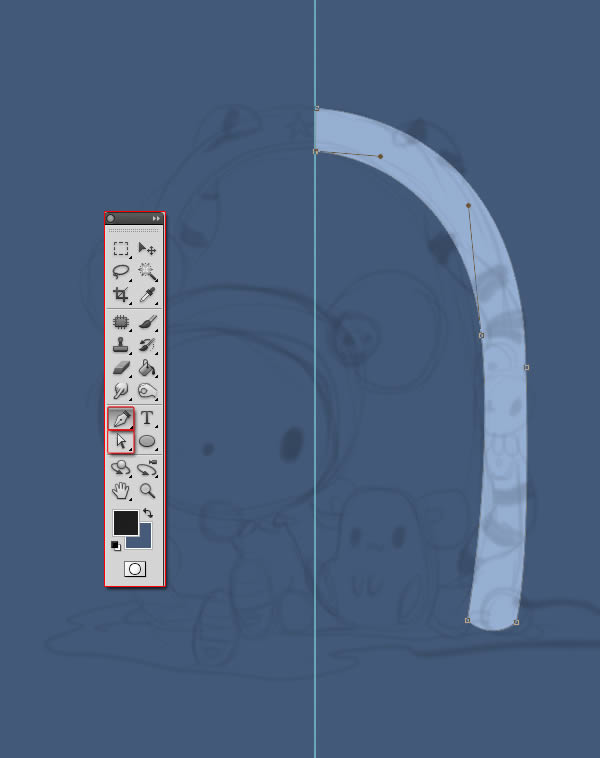
Begin to add the embellishments. It is not necessary to always follow the ways of the sketch.

Step 12
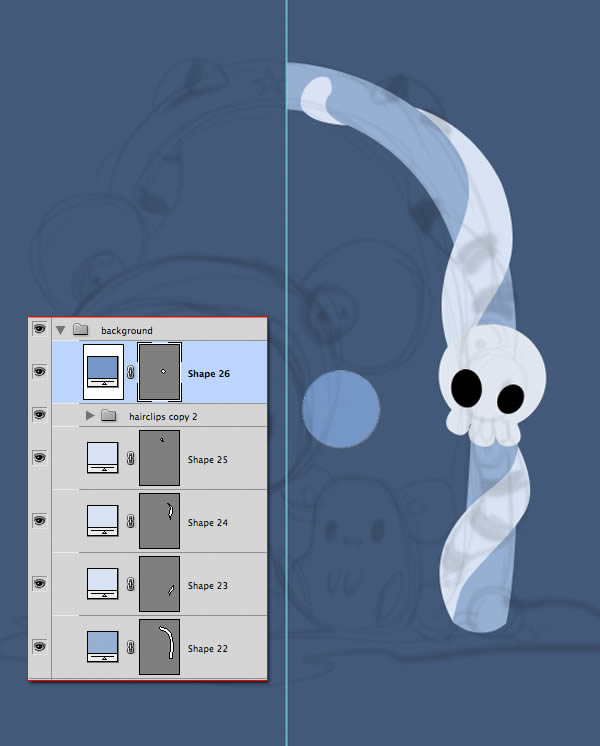
For the central ornament, use the skull of the hair clip. Duplicate the group and make it bigger using Command + T. Now, create a circle for the back of the skull.
Duplicate the circle by dragging the layer pressing Alt. Change the color to a darker blue and press Command + T. In the Transform options, select Mantain Aspect Ratio, and set the Scale to 60%. Repeat with a third circle of the same color as the first.
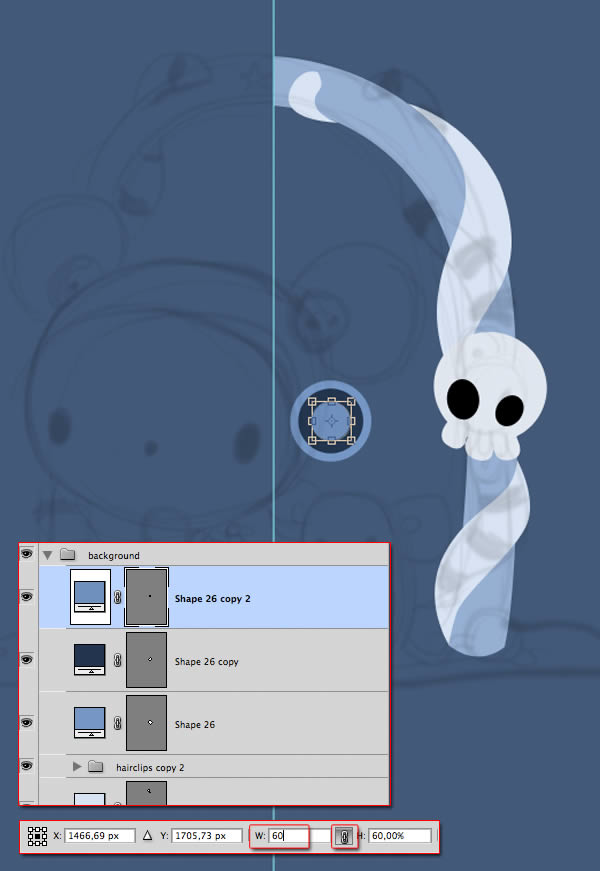
Place the circles behind, above and below the skull.
Step 13
Now add the black stripes and place them within the white shapes using Clipping Mask.
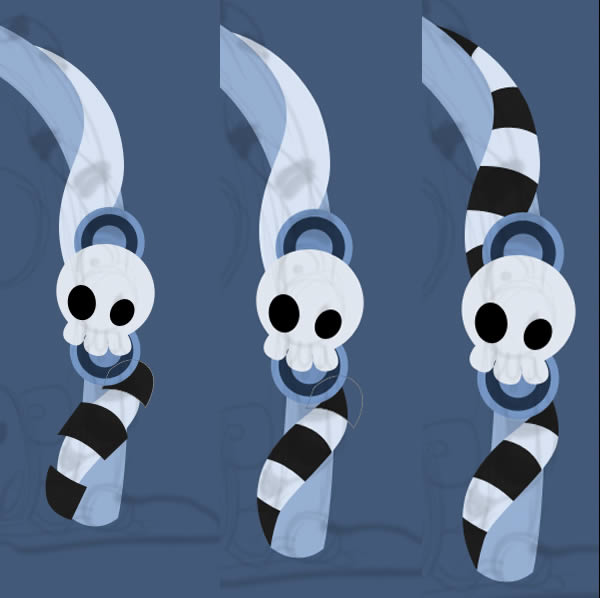
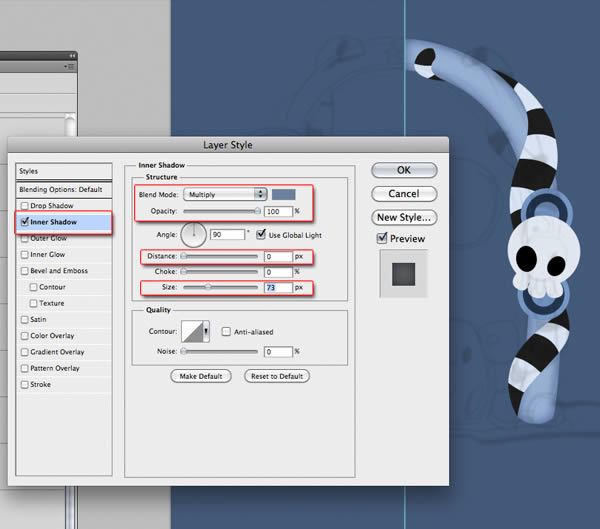
Step 14
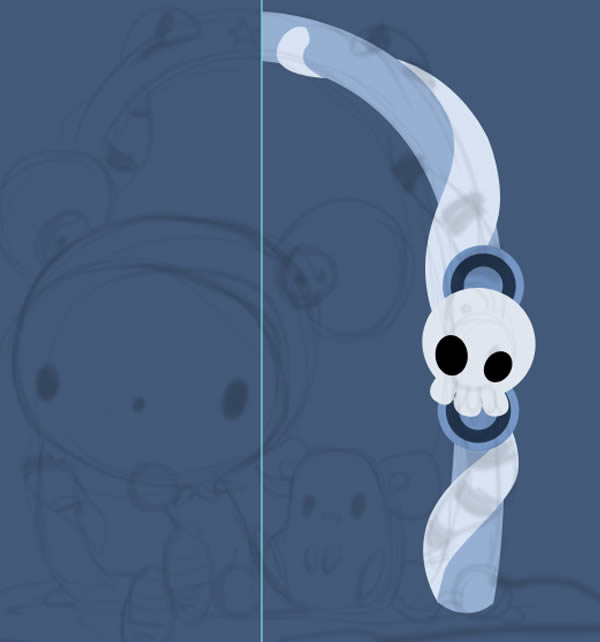
Now, paste the Layer Style on the arc, use a darker color if necessary, and change its size to create a sense of volume.
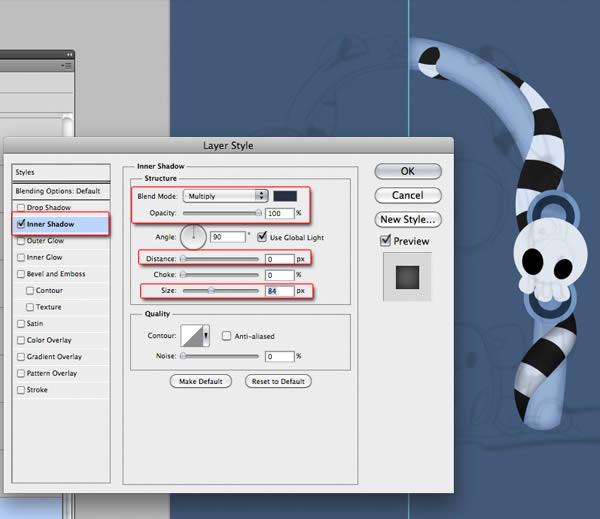
Do the same with the white shapes. This time use a dark, desaturated blue. Copy the Layer Style and paste it on the other Shapes. Modify the Size where is necessary.
Step 15
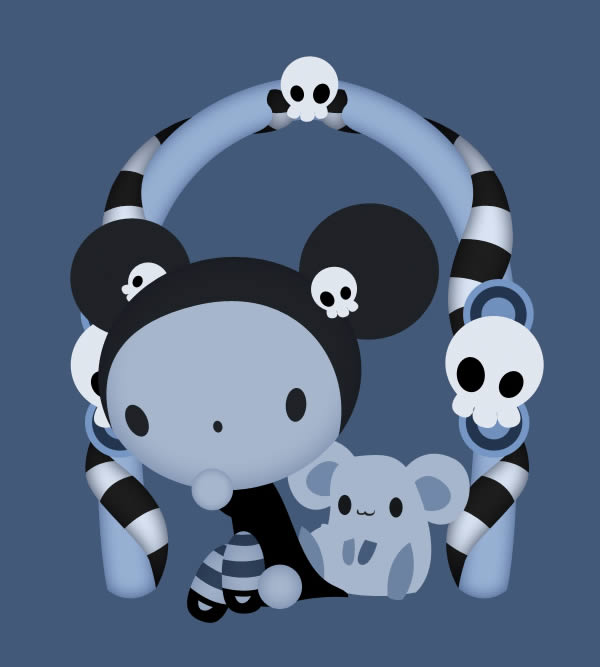
Duplicate the group arc, press Command + T, click the right mouse button and select Flip Horizontal. Move the picture to put in place. You can turn on the other groups to go see the result.
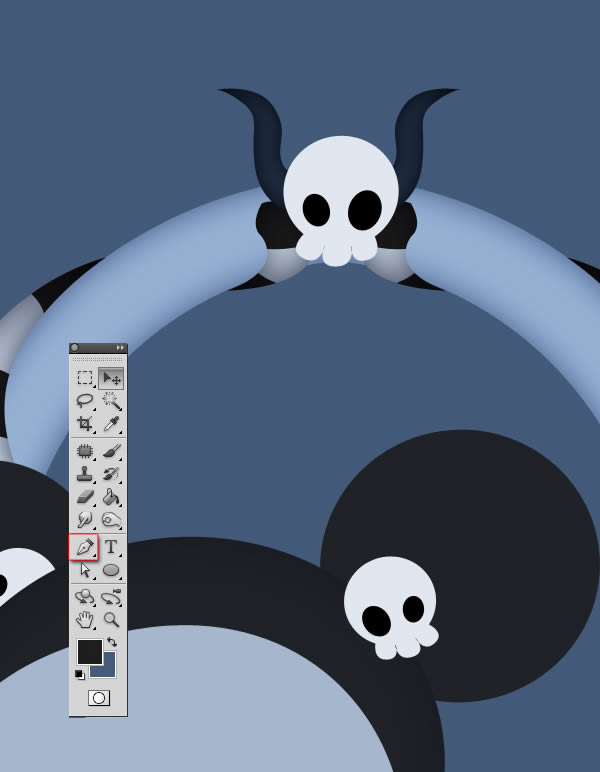
Step 16
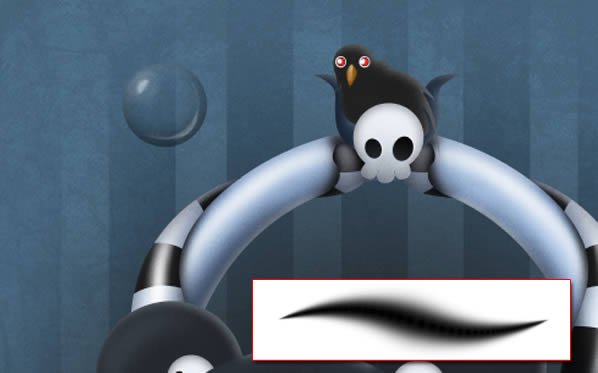
Copy the skull once again and add various embellishments, in this case, a pair of horns, and add Inner Shadow to them.
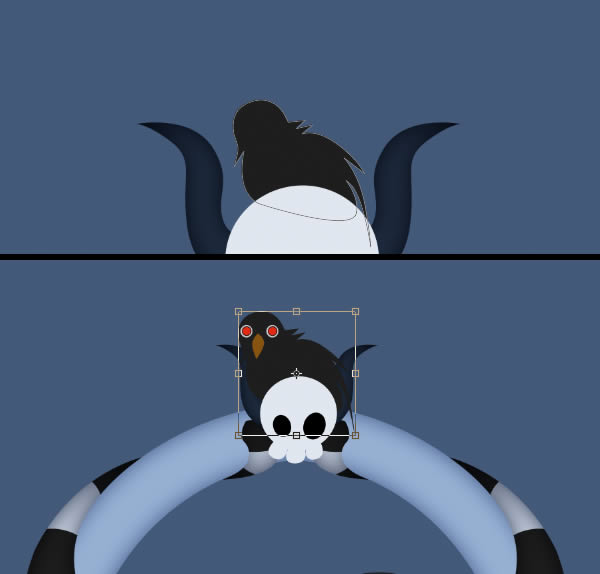
Now, draw a new group within for the crow (or whatever you want). Start by drawing the body and then add the eyes and beak, always using the Pen Tool (P), the Ellipse Tool (U) and the Direct Selection Tool (A). Then, scale it to fit.
Step 17
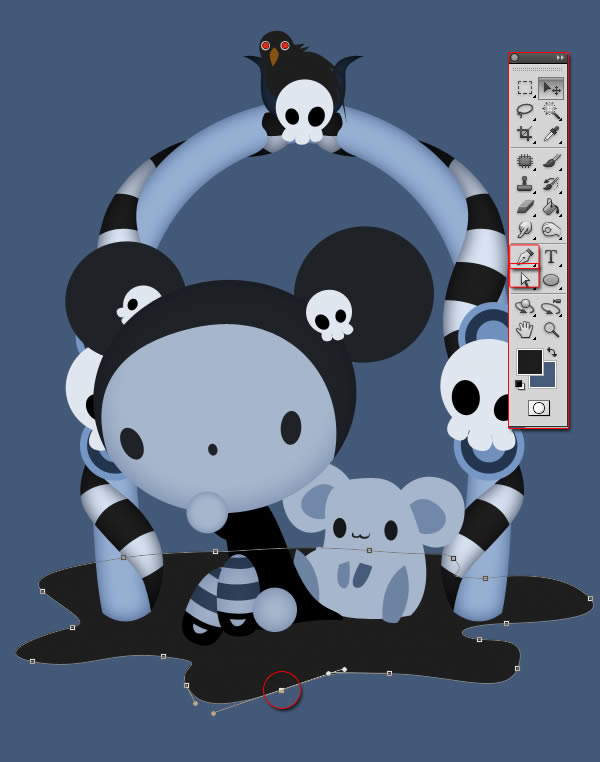
Now, create a new group called “background” and draw a spot with a very dark blue. Soften the forms with the Direct Selection Tool (A).
Step 18
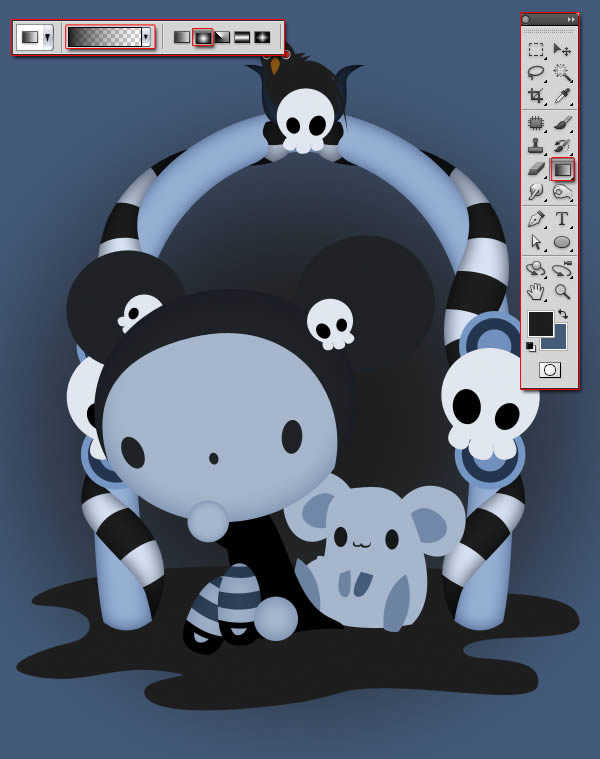
Add a layer below. With the Gradient Tool (G), select from the options the Radial Gradient and Foreground to Transparent and select black as foreground color. Make a gradient from the center of the canvas that does not touch the margins.
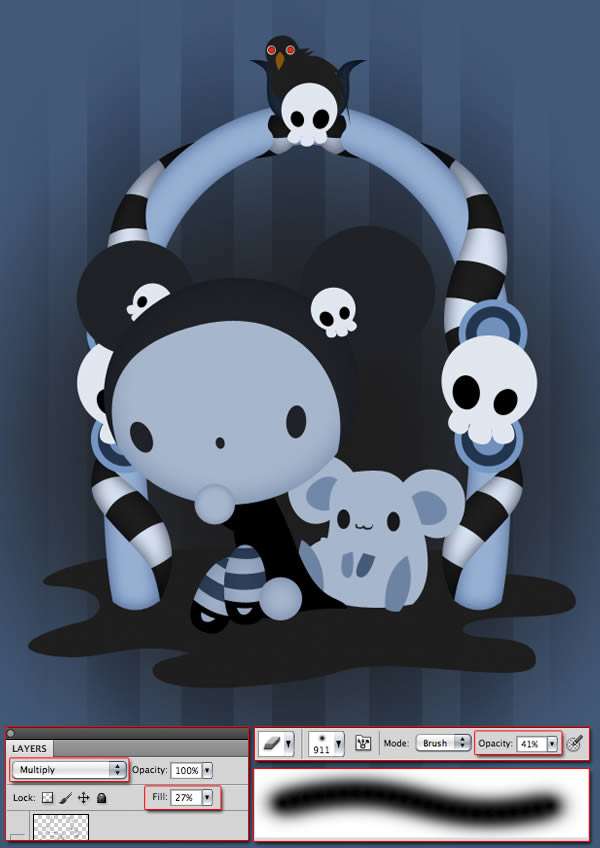
Step 19
With the Rectangle Tool (U) creates a strip of blue.
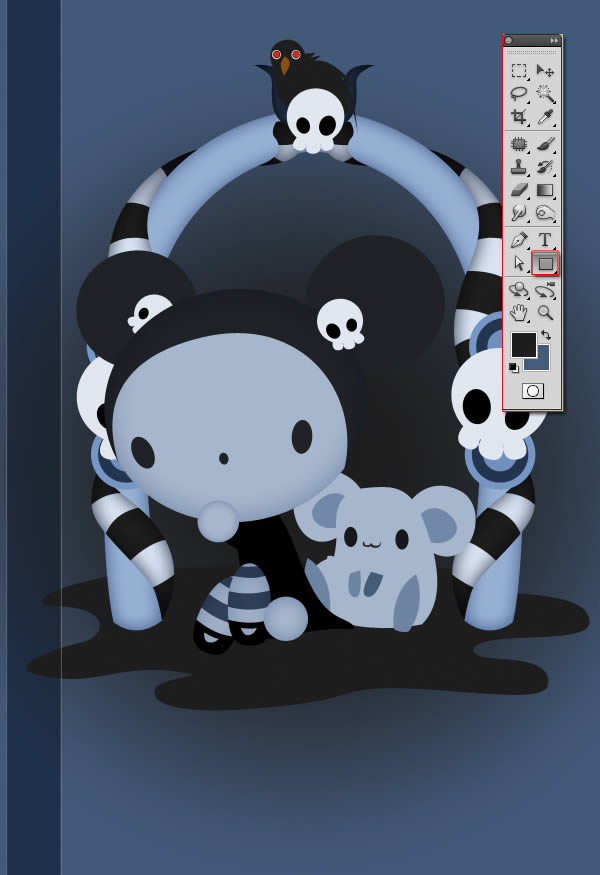
Duplicate it as many times as necessary to make a striped background. Merge all stripes by selecting them and pressing Command + E. Set the resulting layer in Multiply mode set it to 27% Opacity. Use the Eraser Tool (E) with 41% opacity to slightly clear the outside and corners.
Step 20
The next step is to give light and shade. Deletes the group of half the arc, leaving only one. In each of the parts of the drawing put a Clipping Masks and start painting with white on a layer in Overlay mode and black on a Multiply layer mode, using a soft brush (B) and smoothing with the help of the Eraser Tool (E) with low opacity.
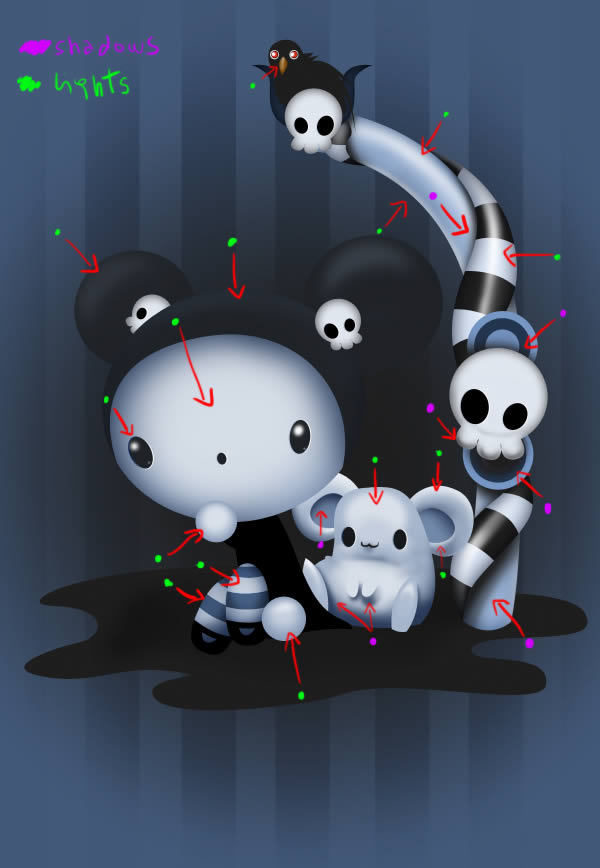
You will have to go changing the opacity of these layers in function of the visibility it makes on each background color. Some must be more visible and others less. The aim is to give a bit of volume and separate the figures.
Step 21
Duplicate the half arc, and place it on its site. Select both groups and duplicate them. Merge them in a single layer and place it underneath. Press Command + T. Now move the central pivot down to the center point as in the image below.
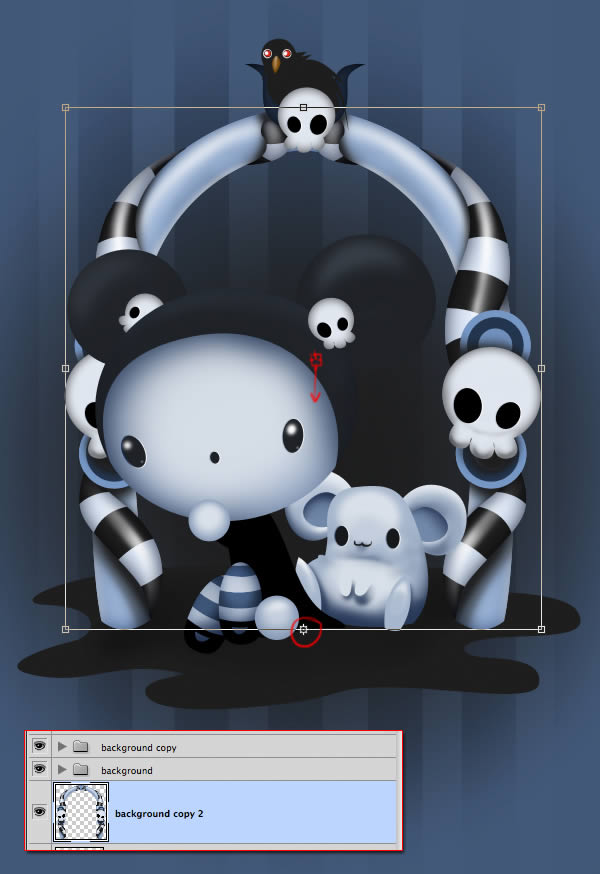
Click the right mouse button and click Flip Vertical. You can see that the base of the image is placed where the base of the original. Put within the ground spot with Clipping Mask.
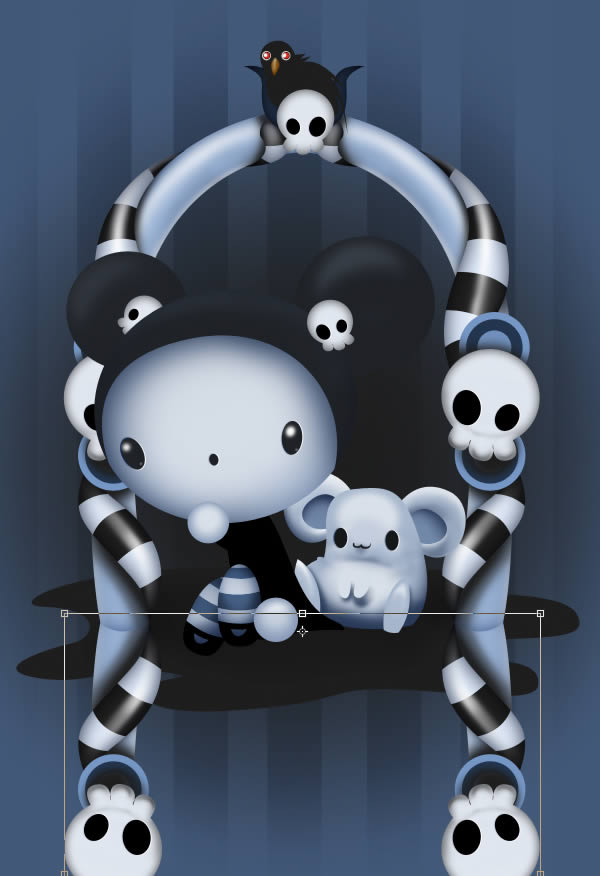
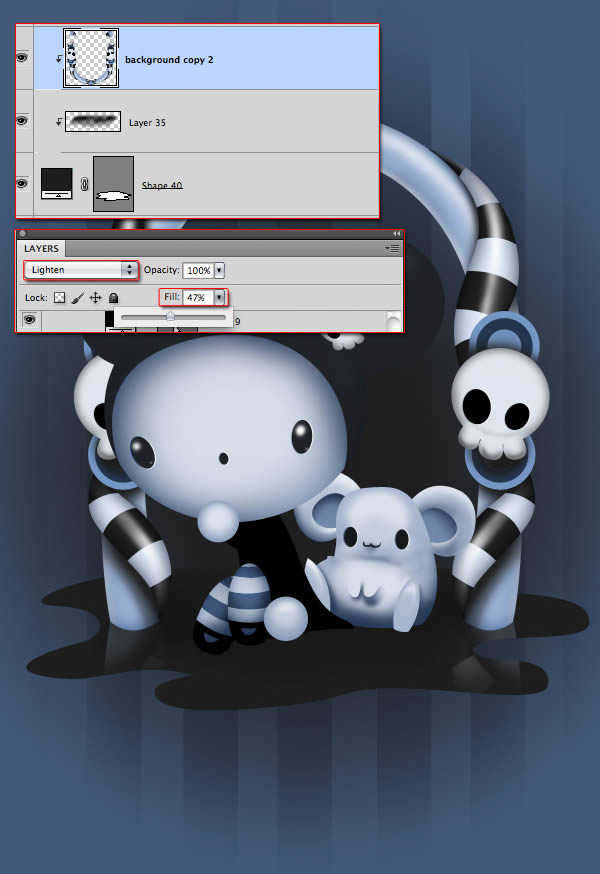
Add a new layer under the arch and paint shadows with the Brush Tool (B) under the characters. Put the reflected arc layer in Lighten mode set to 47% Opacity.
Step 22
Duplicate the groups with the other characters, merge them and repeat the same process as with the arc to make the reflection.
Step 23
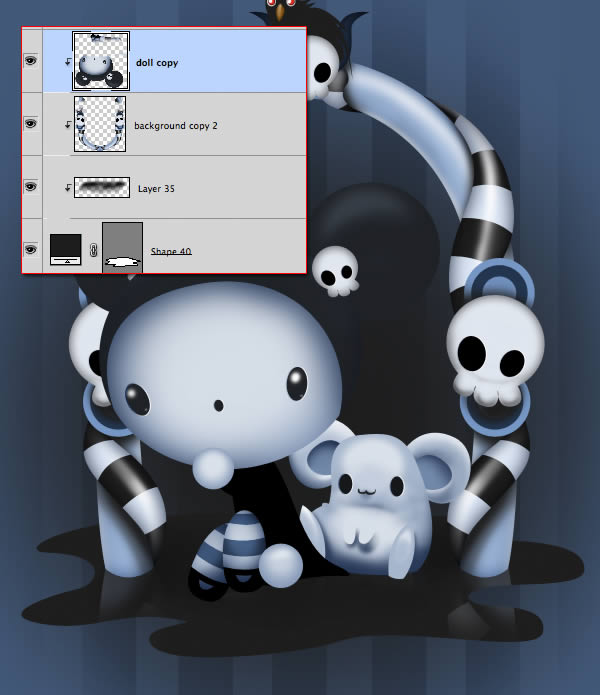
Now, create a new group and placed in it all other groups. Duplicate it, select and click each figure or group of figures, and press Command + E, just like in the picture below.

Step 24
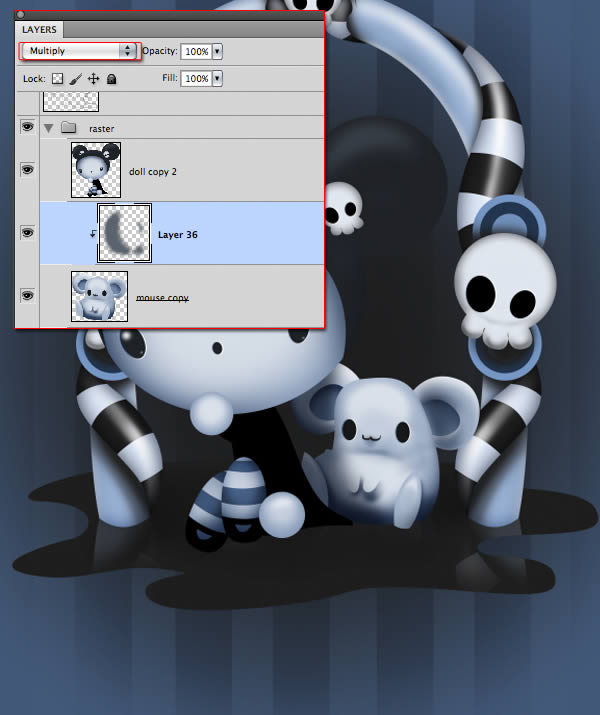
Now, using layers in Multiply mode, with a bluish gray color, add some shadows to separate even more a figure of another.
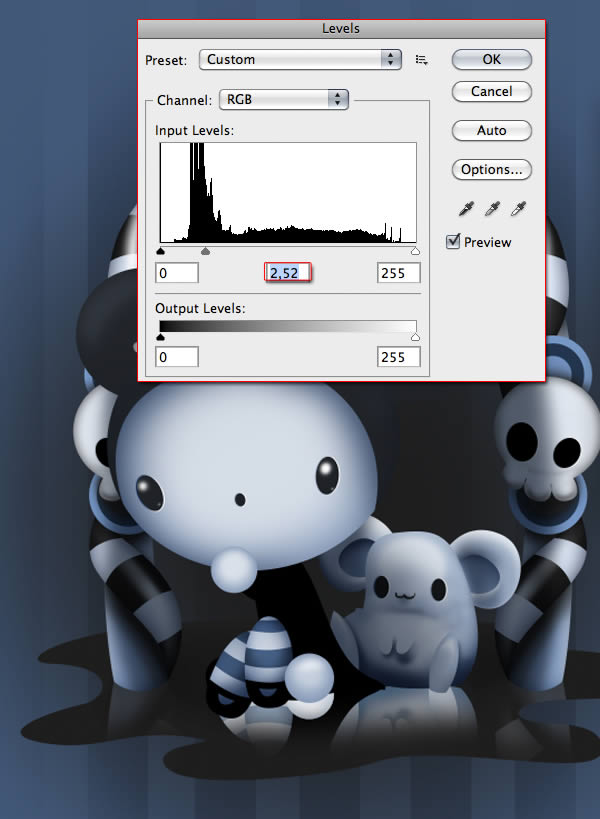
Step 25
At this point, I see the need to make more visible the reflection of the characters, so in that layer, hit Command + L (Levels) and put the Grey point level at 2.52, to give more clarity.
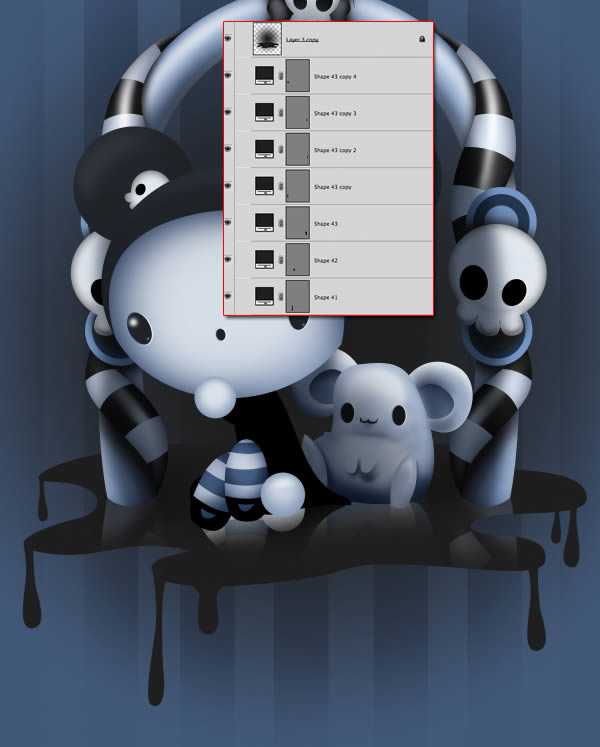
Step 26
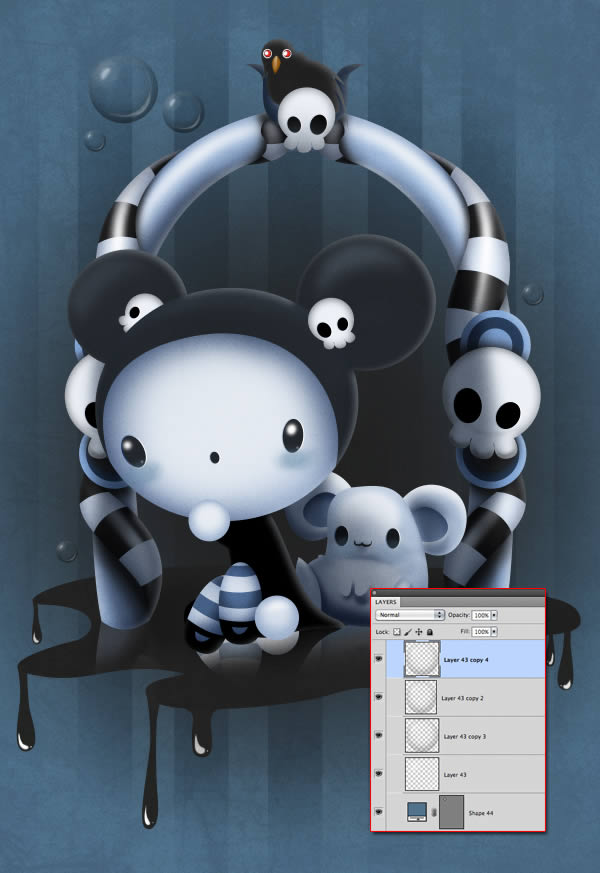
Select the Pen Tool (P) and underneath it all, draws the drops.
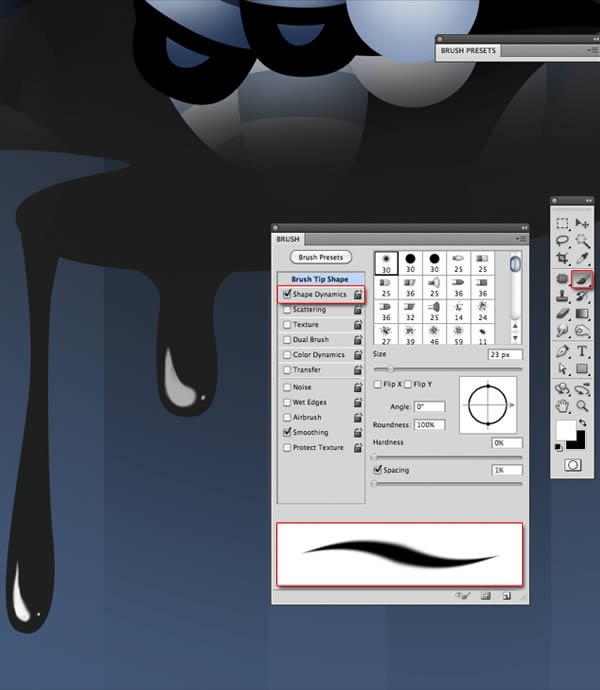
Step 27
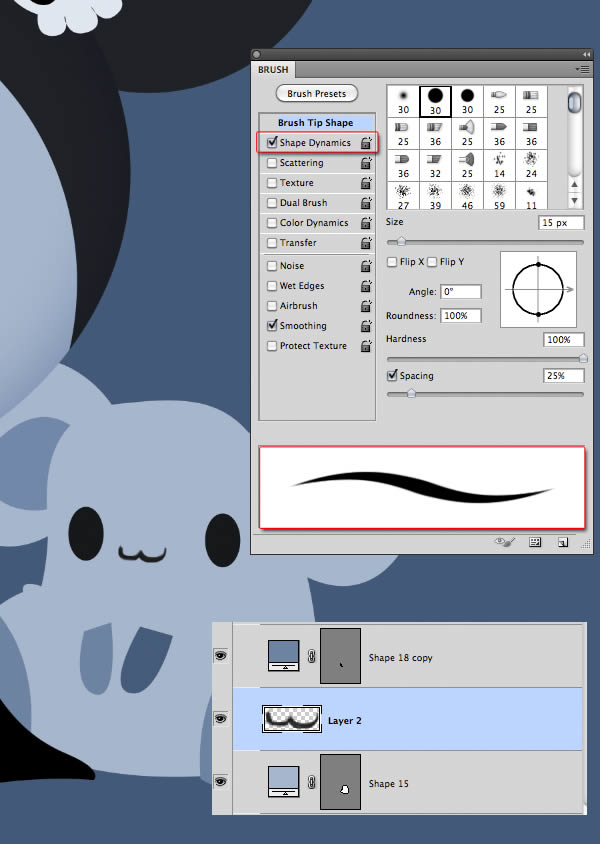
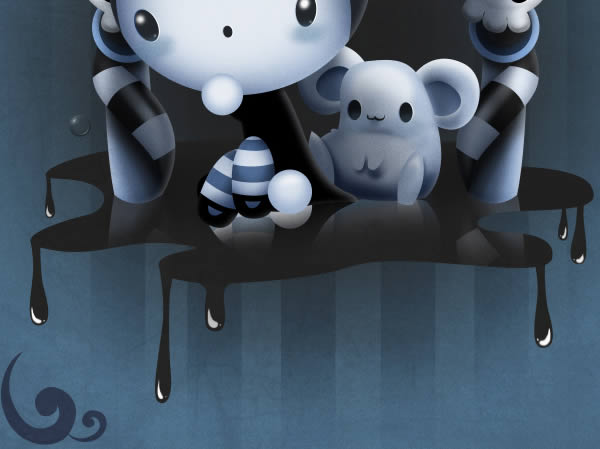
With the Brush Tool (B), with Shape Dynamics activated and white color, draw the lights of the drops.
Step 28
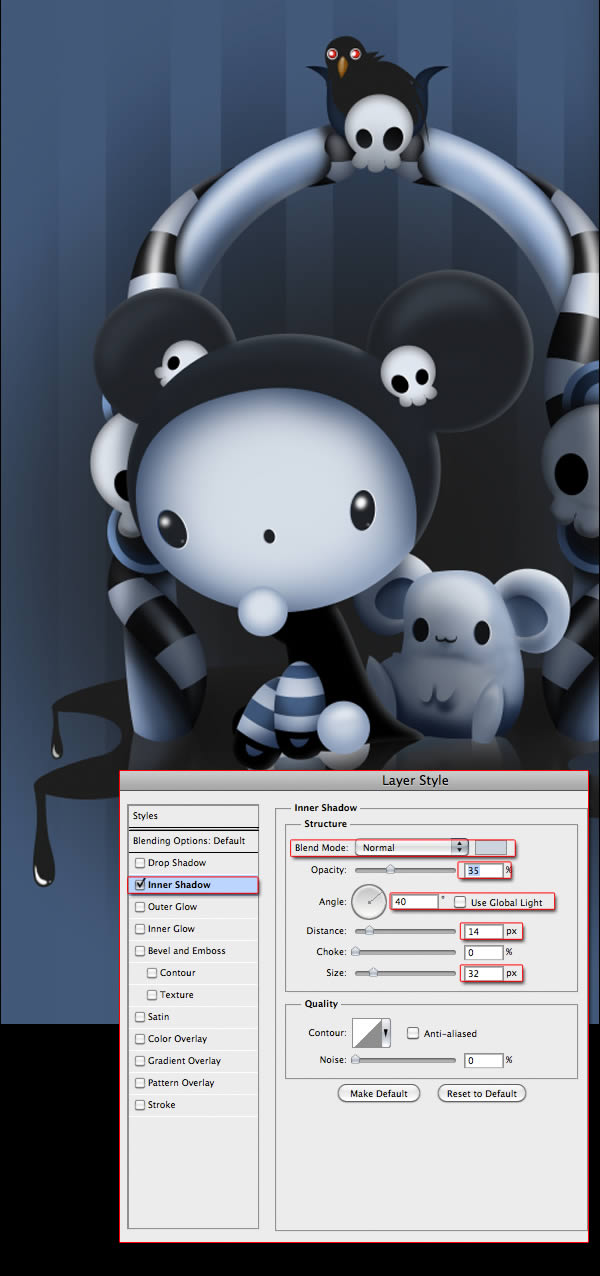
Double click on the layer of the doll, select Inner Shadow, set Blend Mode to Normal and choose a light blue color. Uncheck the box “Use Global Light” and set it at 40. Set the other options as in the image below. Copy and paste the Layer Style in the other layers except of the ground, drops and background.
Step 29
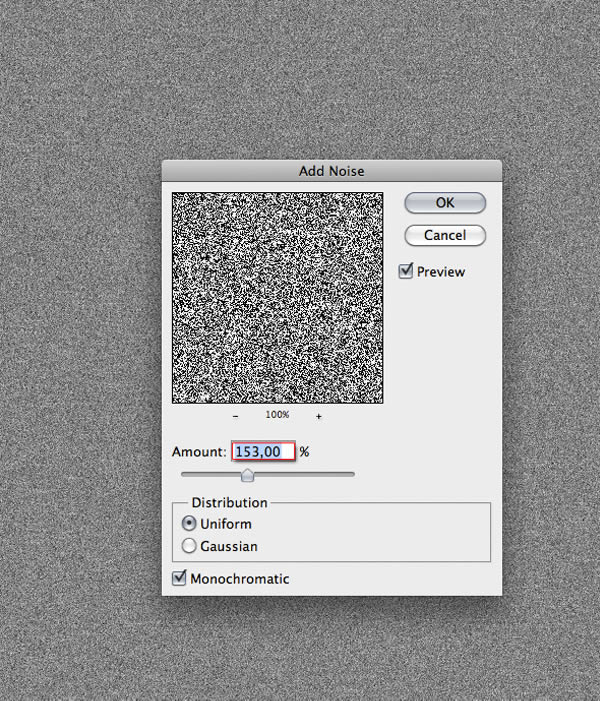
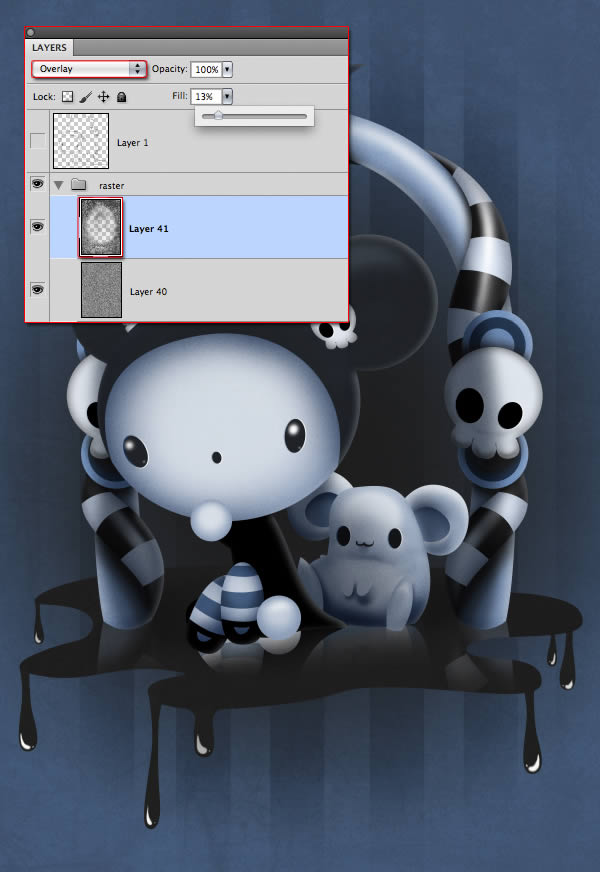
Add a new layer on top (Shift + Command + N), paint it gray with the Paint Bucket Tool (G). Go to Filter>Noise>Add noise. Set the amount to 153%, Distribution: Uniform and check Monochromatic.
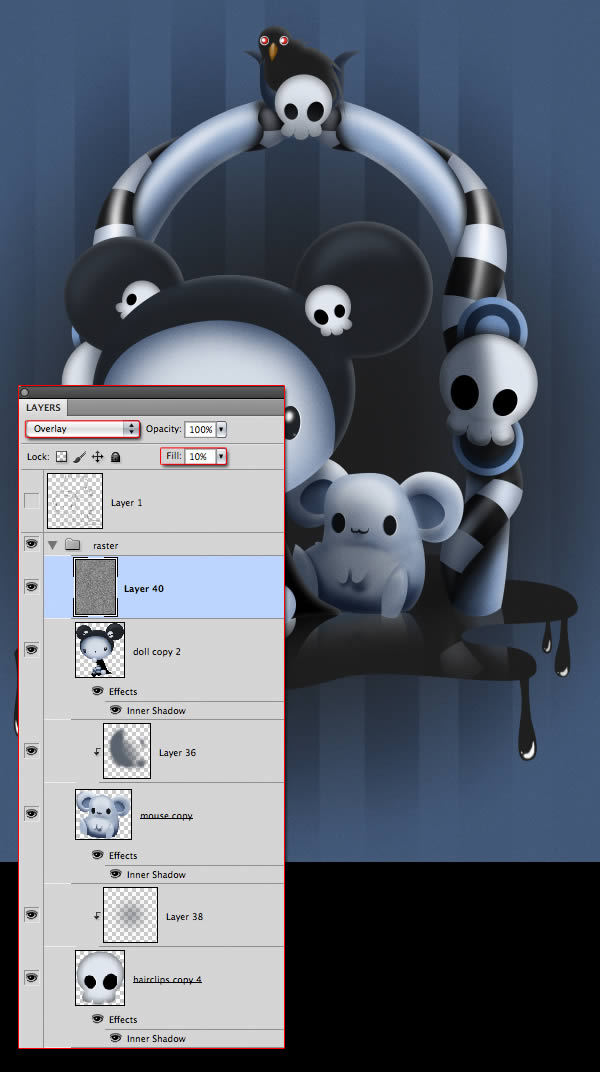
Set the layer to Overlay mode, and 10% Opacity.
Step 30
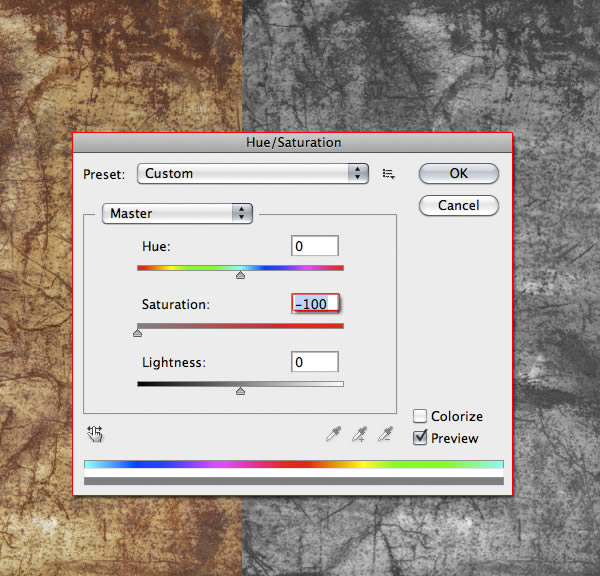
Place the texture covering the entire canvas and open Hue / Saturation (Command + U). Set Saturation to -100
Step 31
Now, put the layer in overlay Mode, 13% Opacity. Pick the Eraser Tool (E), and with a soft brush with low Opacity, erase in the center of the image very softly.
Step 32
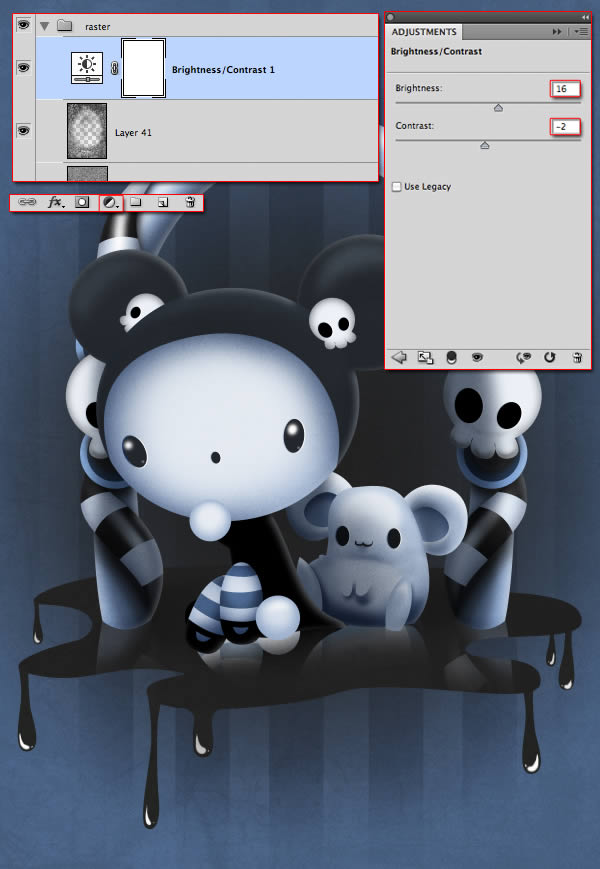
Add an Adjustment Layer, choose Brightness/Contrast. Set Brightness: 16 and Contrast: -2.
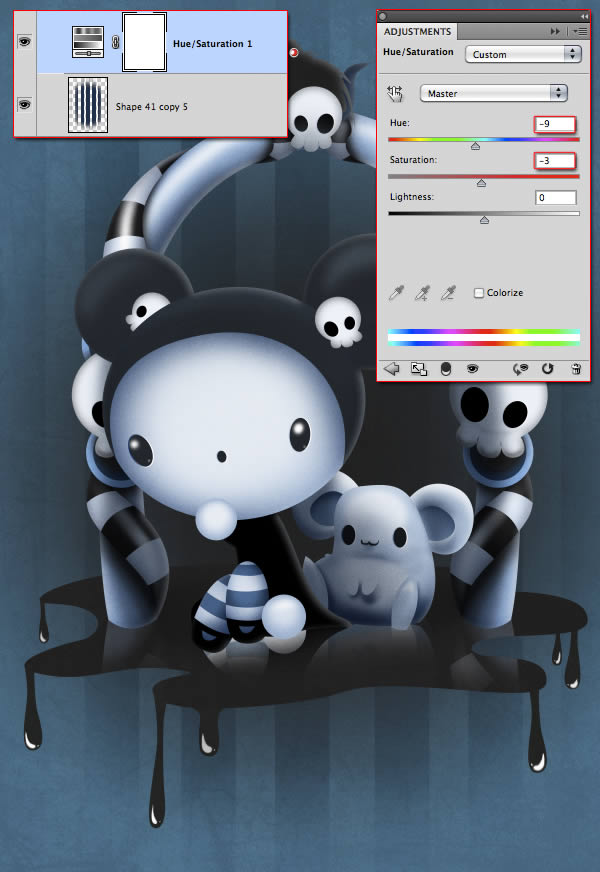
On top of the background stripes, add a Hue/Saturation Adjustment Layer and set Hue: -9 and Saturation: -3.
Step 33
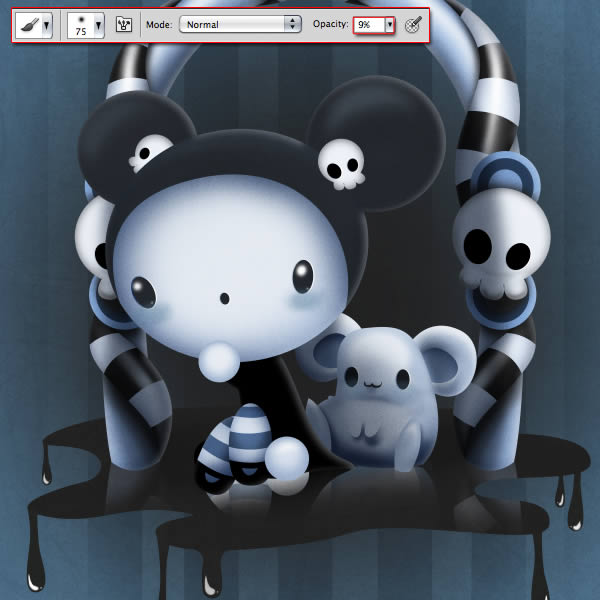
Now add a new layer above the doll, choose a soft brush to 9% opacity and with blue like the shadows of the face, paint the color of the cheeks.
Step 34
Now, let’s go for the bubbles. Make a circle with Ellipse Tool while holding Shift to make it round and take off all the opacity.
Double click the layer and choose Inner Shadow. Set as the image below.
Now select Bevel and Emboss. Set as the image below.

With the Brush Tool with Shape Dynamics activated and using white, paint the highlights in a new layer.
Duplicate the layers and merge them (Command + E) and place a few of them around in different sizes.
Step 35
Finally, create a new group. Use the Pen Tool (P) to make shapes like in the image. Duplicate them and place them on every corner. Add a few lines as a frame with the Rectangle Tool (U).
Final Image
DIGITAL JUICE
No comments:
Post a Comment
Thank's!