 I'm continually amazed at the usefulness of a small but complete $35 computer that is the size of a deck of cards. I'm coming up with all sorts of uses for the three Raspberry Pi devices in our house. I talk about our experiences in Top 10 Raspberry Pi Myths and Truths, but right now I want to share what I did with a Raspberry Pi over lunch today.
I've got a lot of video on my iPad and iPhone and I've always wanted to be able to use "AirPlay." Basically AirPlay is a simple way to "throw" video or music at a device. I'm always plugging my iPad into the TV with an HDMI cable.
At some point in the future more receivers and TVs will include AirPlay built-in. I could buy an Apple TV for $99 as it includes AirPlay. However, I don't want AirPlay $99-dollar-bad. Maybe $35-dollar-bad. Since a Raspberry Pi with Ethernet is $35, ahem. It's on.
Back during the original Xbox days when folks were rooting their Xboxen left and right, the most useful thing you could install on it was XBMC. It turned your Xbox into a complete, flexible and modular Media Center. Fast-forward almost 10 years to today and XBMC is an ecosystem on its own, long separated from the Xbox. You can get XBMC for Android, even! There's XBMCs for Mac, Linux, Windows, iOS and more. Even Apple TVs themselves can be rooted and run XBMC.
The most promising new entry into the XBMC space is Raspbmc. Yes, a complete XBMC install for a the tiny Raspberry Pi. The most amazing part is the clean Windows installer for Raspbmc in my opinion. You run it on your Windows machine with an SD card plugged in and the installer does all the work of downloading, formatting and prepping your SD Card to run on the Raspberry PI. The whole operation took a few minutes. Then I put the SD Card in the Pi and waited maybe 15 and then I was looking at the boot screen. Very painless.
Raspbmc is full featured and virtually includes all the XBMC functionality - which is an amazing feat given the limitations of the hardware. The most recent Raspbmc Release Candidate 4 added a lot of new improvements that made this the perfect time to jump in.
I just want AirPlay, so note that while there's WAY WAY more in Raspbmc and XBMC than this ONE feature (and technically I could probably make a very stripped down distro that included only this one feature if I wanted to be a purist) I'm only interested in AirPlay. I want AirPlay with a high WAF (Wife Acceptance Factor.) That means she needs to press a button on the Receiver, hit play on her iPad and it needs to Just Work©.
After installing Raspbmc I used a USB keyboard to go into the System > Network menu and checked "Allow XBMC to receive AirPlay content."
If you want to use your iOS or Android device as a remote control to control your Raspbmc you can ditch the keyboard after initial setup. There are iOS and Android versions of the Official XBMC Remote. Just make sure you've enabled your Raspbmc in System > Network to be controlled by a Remote application. If you are feeling extra snazzy you can even get a real remote control and use one of those via USB IR. Perhaps you have a remote control lying around from an older Xbox or ATI Video Card like I did.
After setup, I needed to setup video, power, and networking. Here's what I ended up with.
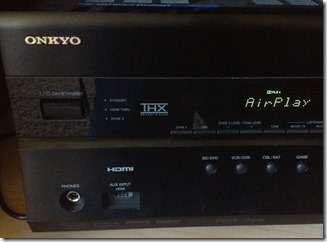
- Video - Just plugged a 3 foot HDMI cable from the Raspberry Pi directly into an unused HDMI on my Onkyo Receiver. I used the "PC" input as that would make sense to my wife, then I used the Onkyo setup to make the onscreen label say "AirPlay."
- Power - I was going to pull a long USB cable to the Pi when I realized that I have a lot of devices (PS3, Xbox, Tivo, etc) that already have USB. I used a 2 foot USB cable and just leached power off the Tivo's built in USB! If your cable box's USB can do 500 mA you can likely do the same! Amazing.
- Ethernet - I wired the whole house many years ago and actually did a 5 Part Series on my blog about wiring your house for Ethernet. Because I put in a small wiring closet I could adjust ports as I like. I changed an RJ-45 phone port into an Ethernet port at the closet, labeled it, and plugged in. If you don't have wired ethernet near your TV, you can either put in a Hub, a Wireless Ethernet Bridge or get a USB Wireless Adapter for the Raspberry Pi.


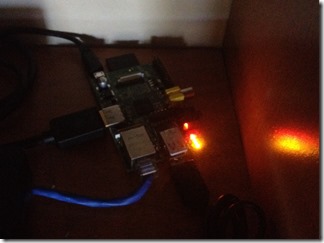
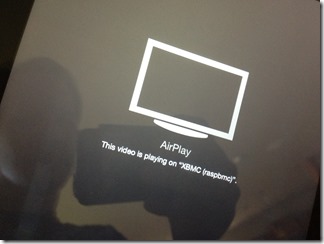
Here's my little Pi behind the TV, and my iPad saying it's playing video on the "XBMC raspbmc."


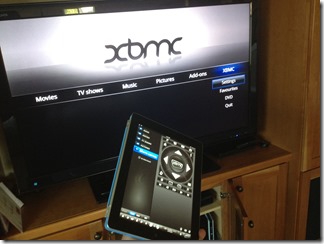
Here's me using an iPad as a remote (although since I'm just throwing video at it, I won't need the remote except for configuration, and I'll SSH into the Pi to do system updates) and finally watching 1080p video on my TV, at last.
Because any video app within the iOS ecosystem gets AirPlay support this also means I can throw YouTube videos or whatever HTML5 video I find up on the TV as well. All for $35 and a lunch hour. Such fun!
© 2012 Scott Hanselman. All rights reserved.
DIGITAL JUICE
No comments:
Post a Comment
Thank's!