In this tutorial, we will explain how to draw a rally car in Photoshop using basic tools. Let’s get started!
Tutorial Assets
The following asset was used during the production of this tutorial.
Step 1
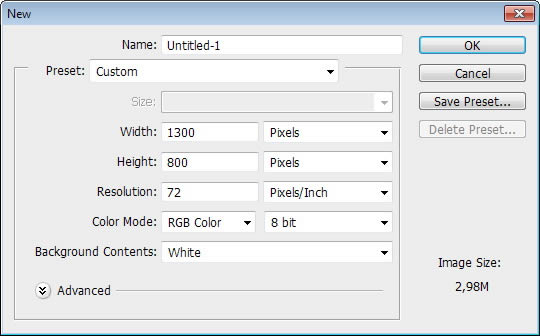
Start by making a new file (Command/Ctrl + N).
Step 2: Sketch
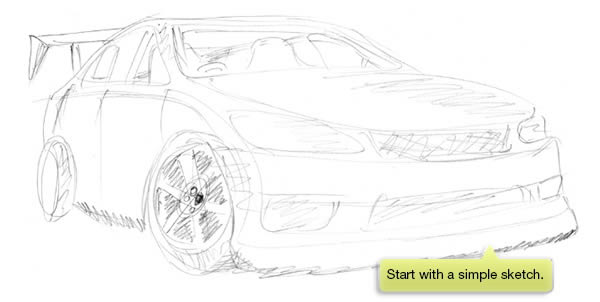
Grab a pencil and draw your favorite car. There’s no need to draw very detail. Just make sure the drawing has perfect perspective. Other small details can be added directly in Photoshop.
Step 2: Tracing in Photoshop
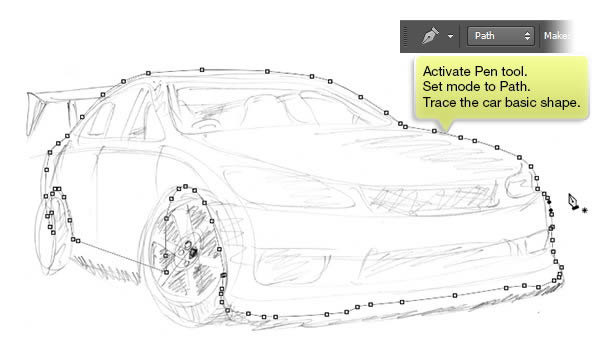
Import the sketch to Photoshop by scanning it and then open it in Photoshop. Activate Pen tool. Set its mode to Path. Trace the car basic shape.
Step 3
Next, trace its inner shape. Set its mode to Subtract to turn it into a hole inside the car.

Here’s our final path.

Step 4: Draw Basic Shape
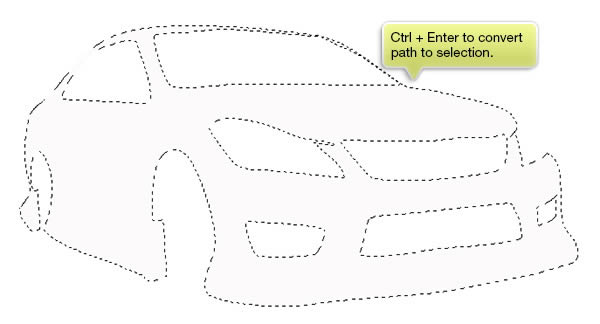
Hit Command/Ctrl + Enter to convert the path into a selection. Make new layer and fill the selection with almost white color (#fcfafb).
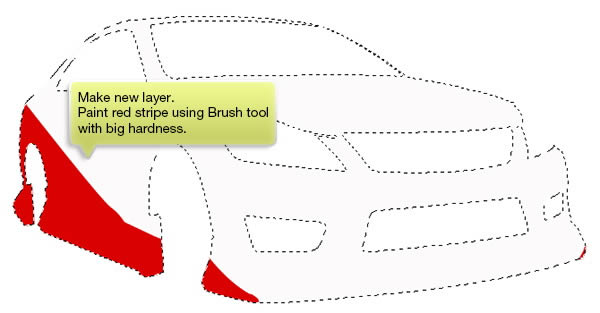
Step 5
Make new layer again and paint a big red stripe using Brush tool. Set its hardness to 100% to get hard edges shape.
Step 6
Continue this process to add another stripe.
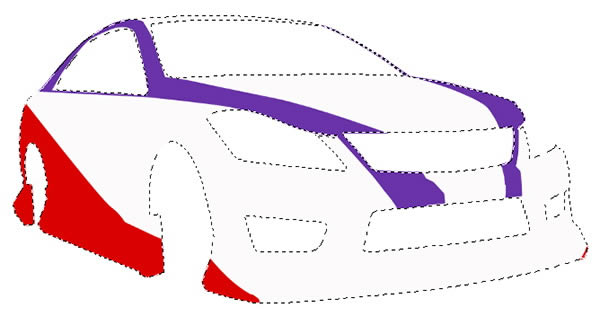
You will also need to match the stripe shape with the car perspective.
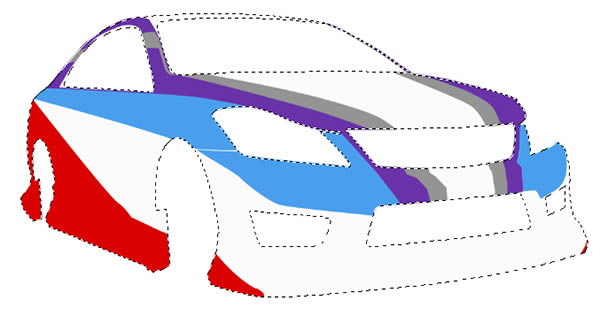
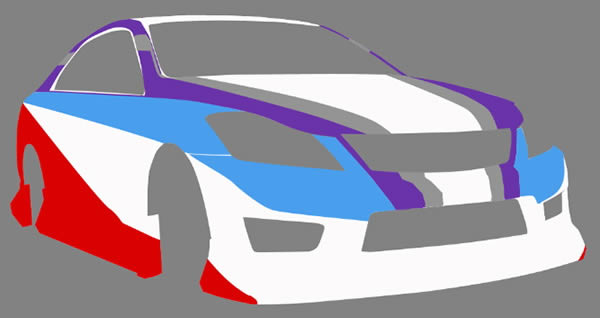
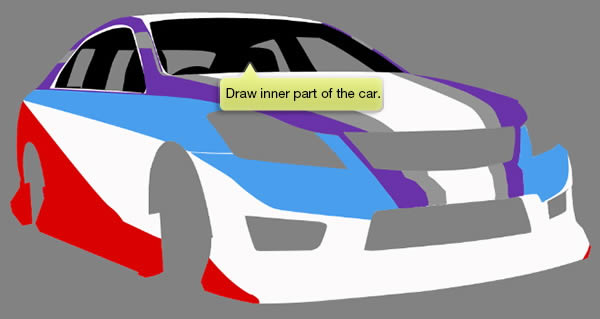
Here’s our result. To help seeing the result, I change the background color temporarely to gray. What we have at this stage is going to be the basic color on our car. If you want to add more color or stripes, you might want to do it now. In the next steps, we will mostly works on adding shadows and highlight to turn this flat drawing into a three dimentional car.
Step 8
Draw inner part of the car. Use Brush tool with foreground color black.

Step 9: Front Bumper
Select front bumper.

Step 10
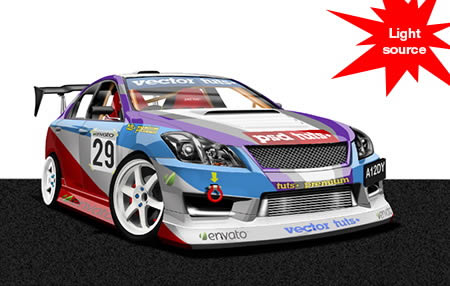
First we need to consistent with the light source. In this image, our light source comes from top right.
Make new layer and activate Brush tool. Select front bumper and paint some shadows. Remember to paint more shadow on area that has less light. Reduce layer Opacity to lower the shadow.

Step 11: Body Lines
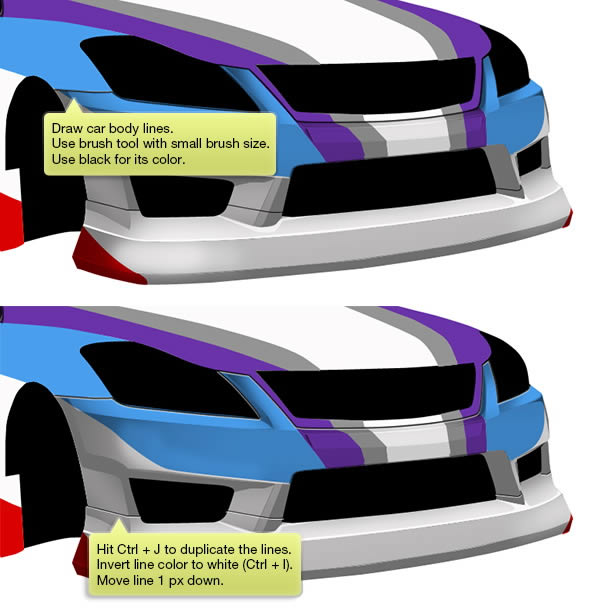
Make new layer. Draw car body lines that separate each part of the car. Use black for its color. Hit Command/Ctrl + J to duplicate its layer. Hit Command/Ctrl + I to invert the duplicated line color to white. Activate Move tool and hit Down Arrow once or twice to move it 1 px or 2 px down. Reduce its Opacity until we have a nice inset effect separating each body part.
Step 12
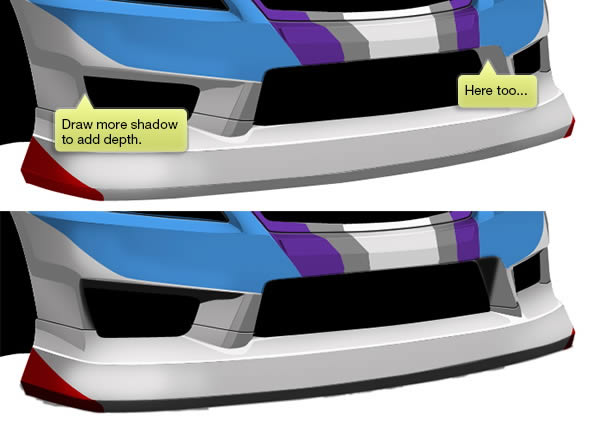
Make new layer and draw more shadow on the bumper surface to add more depth.
Step 13: Doors
Select the door by drawing a path and then convert it to selection. Draw a linear gradient from opaque black to a more transparent black. Reduce layer Opacity.

Step 14
Repeat same step to draw back door.

Step 15: Sideskirt
Select lower part of the sideskirt using Polygonal Lasso tool. Make new layer and then paint some shadows.

Step 16
Draw another shadow on its trunk.
Step 17: Car Hood
Make new layer and paint subtle shadow on the car hood. Use big soft brush with very low Opacity.

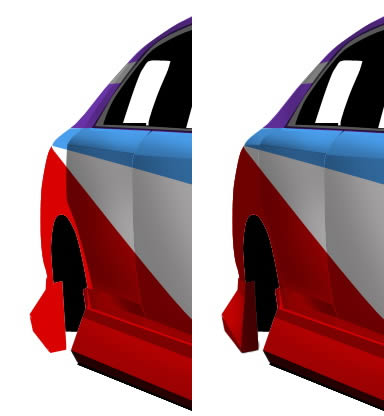
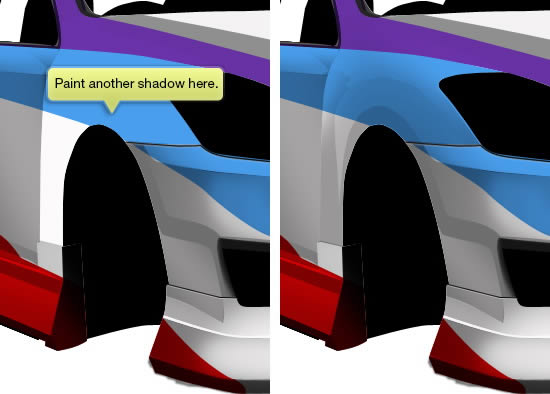
Step 18: Fender
Paint another shadow on its fender. To get a perfect circle shape, you will need to use Marquee Ellipse tool to draw the selection first.
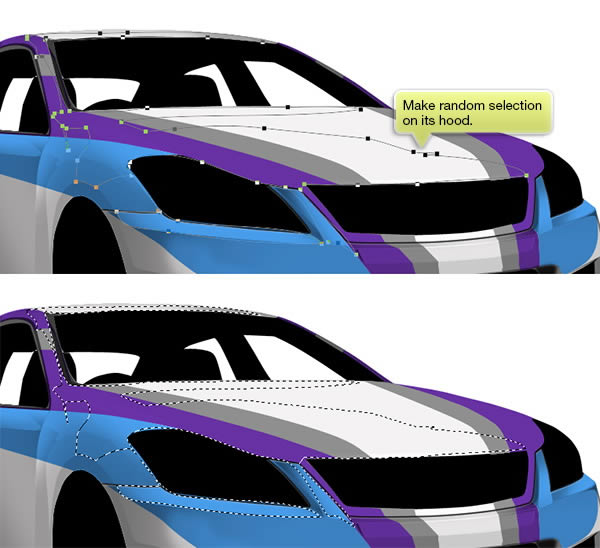
Step 19: Car Surface Reflection
Make new selection on its roof. You can use Pen tool to draw a path to make sure the selection is accurate.
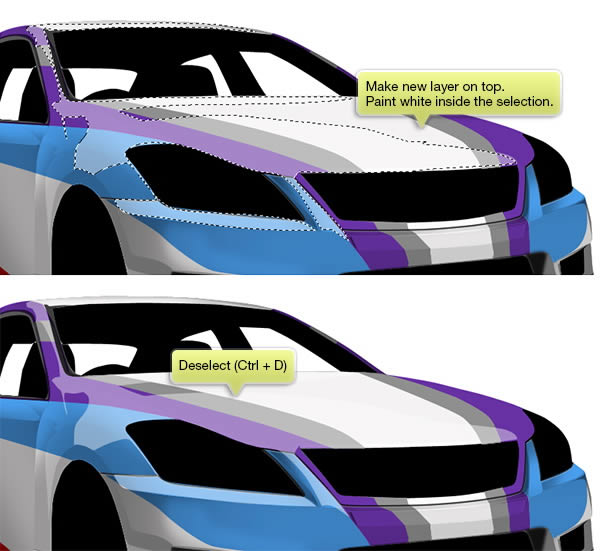
Step 20
Make new layer and place on top. Paint white inside the selection until we have a nice reflection on the car surface. Remove selection (Command/Ctrl + D).
Step 21
Draw another reflection on other part of the car. Use previous technique.


Step 22
Use Brush tool to manually draw random highlight and shadow on lower part of the bumper.

Step 23
To make it realistic, let’s add some imperfect light reflections. Draw simple white random lines using a Brush tool.

Place the line on the car surface.

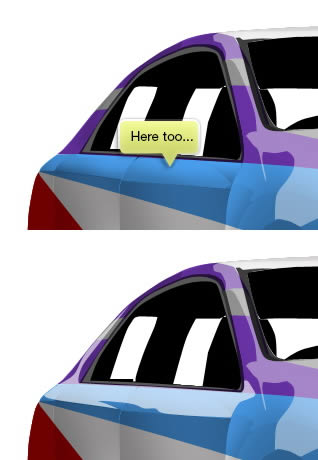
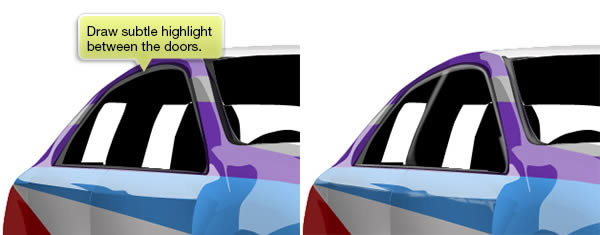
Step 24: Car Glass
Draw subtle highlight between door and its glass window.
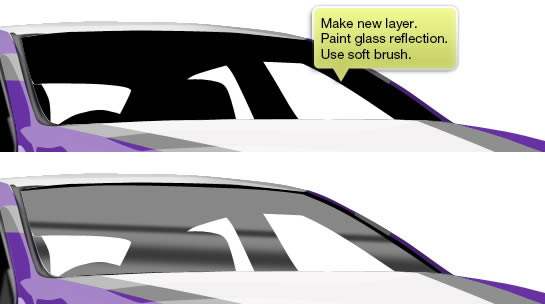
Step 25
Make new layer paint glass reflection using soft Brush tool with low Opacity. You may need to lower the layer Opacity if the result is still too harsh.
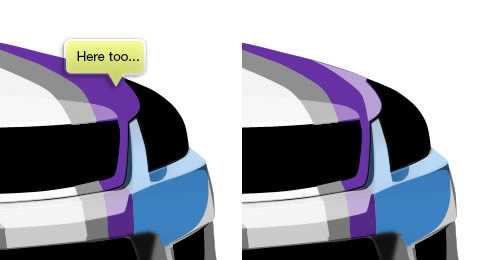
Step 26
Make new layer and draw light reflection on the glass door. Draw 1 px white line on the glass side to give it thicker appearance.

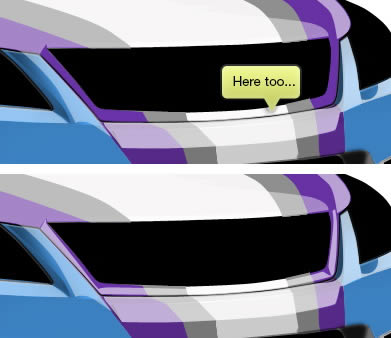
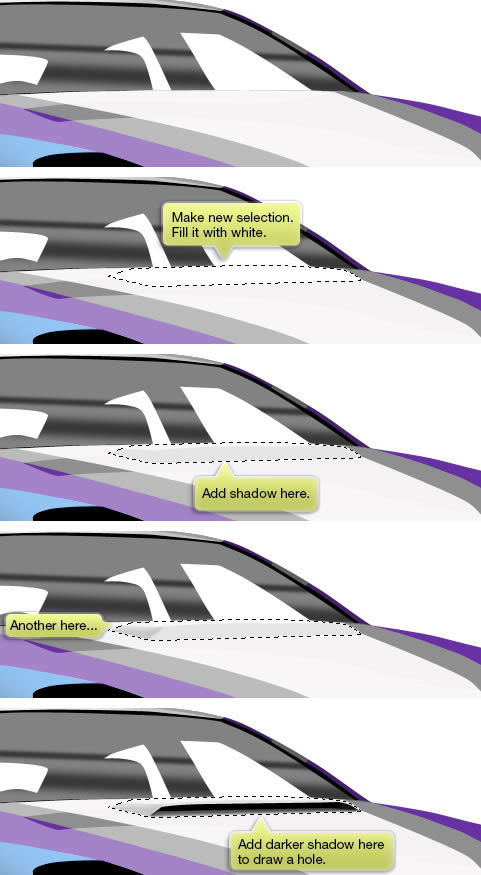
Step 27: Hood Airscoop
On top of the hood, draw a selection and fill it with white. Paint some shadow and highlight until we have an airscoop with air vent in front of it.
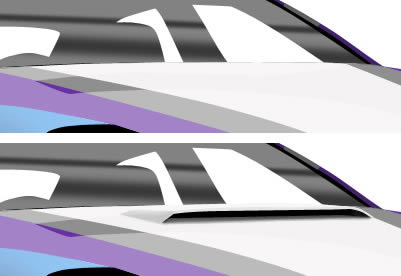
Here’s the result before and after adding the airscoop.
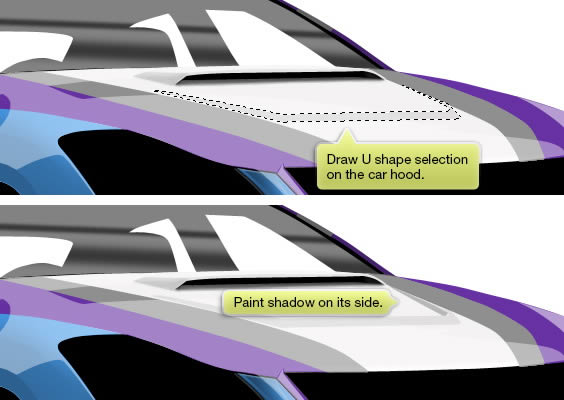
Step 28
Draw U shape selection on top of the hood. Make sure to match it with the car perspective. Paint some shadows on its side.
Step 29
Draw another selection inside the U shape and fill it with white. Repeat this step until we have few shapes inside it.

Step 30
Make new layer and convert it to Clipping Mask. Draw shadow on previous shape.

Step 31
Paint soft highlight on indicated area below.

Step 32: Wire Grill
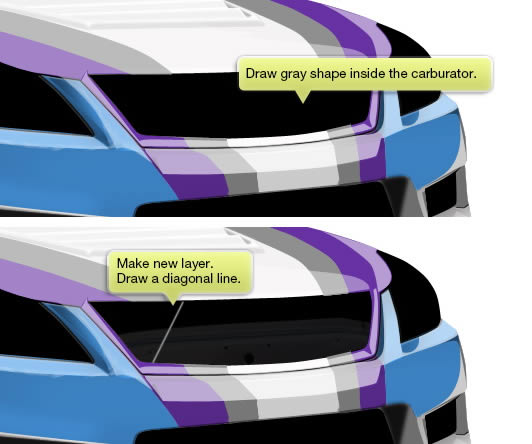
We are now moving on to work on its carburetor. First, draw some gray shapes inside the carburetor. No need to add too many details here. Make new layer and draw a diagonal line.
Step 33
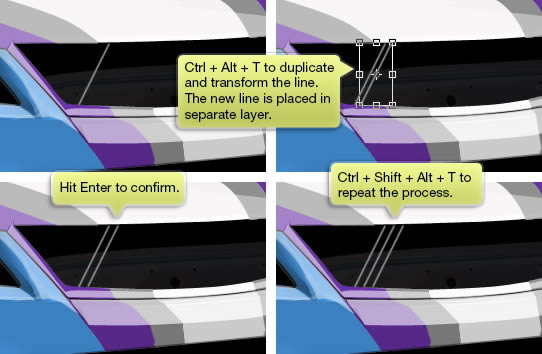
Duplicate and transform the line by pressing Command/Ctrl + Alt + T. Hit right arrow a few times to move the new line. Hit Enter to confirm the transformation and duplication process. Hit Command/Ctrl + Shift + Alt + T to repeat this process.
Step 34
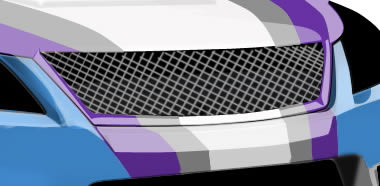
Use same steps to add another lines with different angle.
Step 35
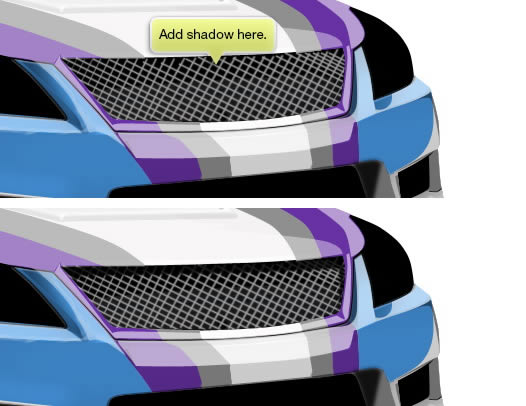
Add shadow on upper part of the carburetor area.
Step 36: Rear View Mirror
Draw a polygonal selection. Make new layer and then fill it with black. Make new layer and paint its upper part with white and lower part with black to add highlight and shadow.
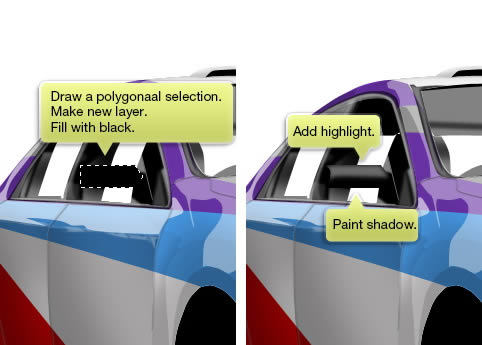
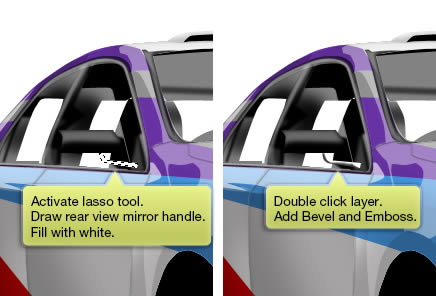
Step 37
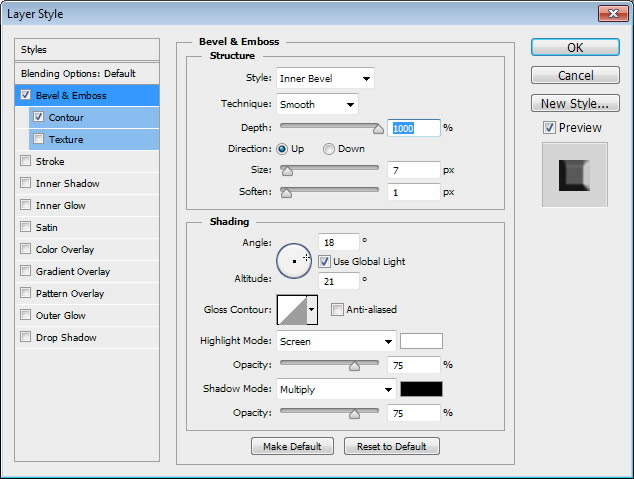
Activate Lasso tool and make selection for rear view mirror handle. Fill it with white and then add Bevel and Emboss.
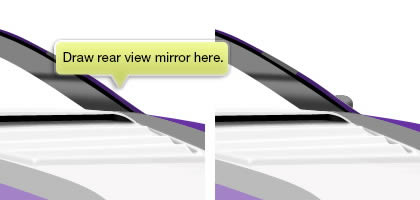
Step 38
Draw another rear view mirror on its opposite side. By judging from its position, only small part of this rear view mirror is visible.
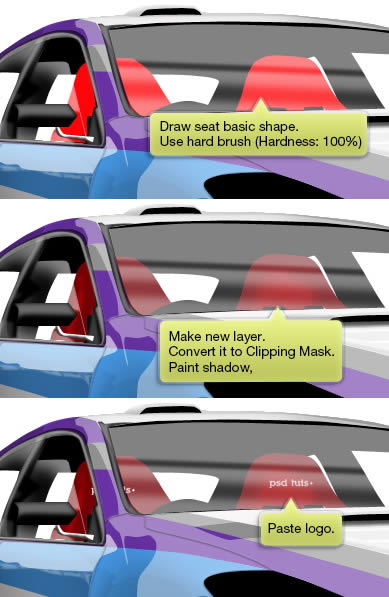
Step 39: Seats
Draw seat basic shape. Here, I’m using red for its color. Make new layer and hit Command/Ctrl + Alt + G to convert it to Clipping Mask. Everyting we paint here will goes inside the seat. Paint black on its edge to add shadow. Paste logo on top of the seat.
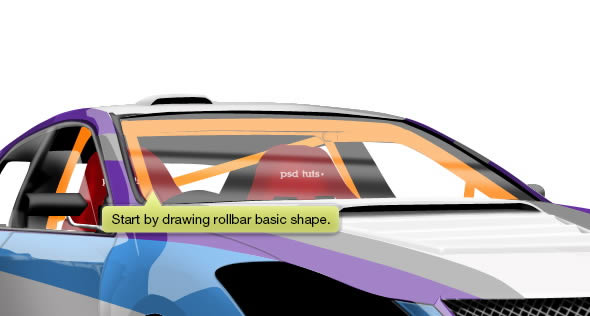
Step 40: Rollbar
Next, we will draw its rolllbar. Start by drawing some simple rectangles. Use the roll bar basic color.
Step 41
Activate Brush tool and reduce its Opacity from the Option Bar. Paint white on center of the rollbar and black on its edge to give it three dimentional appearance. Keed doing this to each rollbar.

Step 42: Tires and Rims
Draw a black elliptical shape for its tire.

Step 43
Make new layer and then paint some highlight and shadow using Brush tool with low Opacity.

Keep repeating this process. See the progress in pictures below.
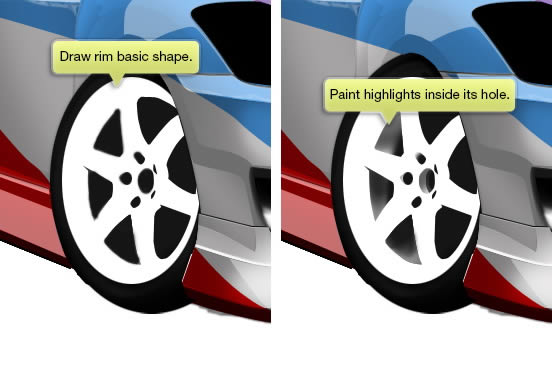
Step 44
Activate Brush tool with 100% Hardness and 100% Opacity. Draw rim basic shape. I want it to be white, so I use white in the foreground color. Make new layer and place it behind the rim shape. Use lower Opacity Brush to paint highlight inside the rim.
Step 45
Paint soft shadow using big and soft Brush around the rim. Paint highlight on center of ring.
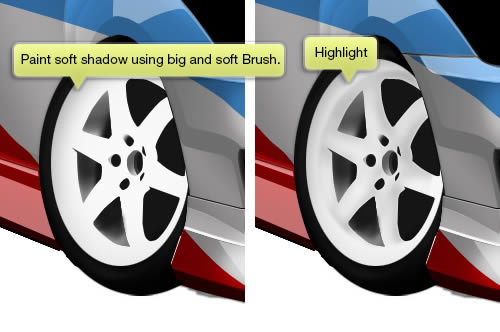
Keep repeating this step.

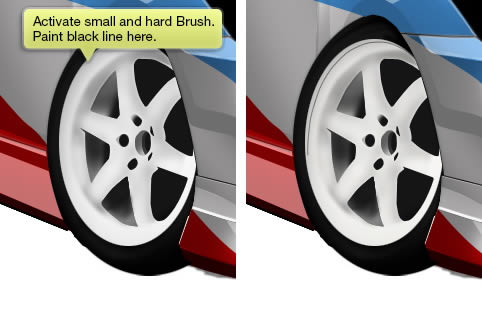
Add more details on the rim. Still using same technique, draw black for shadow and white for highlight using low Opacity Brush.
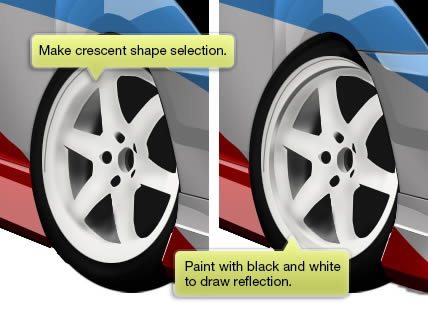
Step 46
Make crescent shape selection on the rim center and paint with white and black to get a reflection.
Step 47
Add colors inside the rim hole to draw bolts.

Step 48
Add details behind the tire such as brake and disk brake.

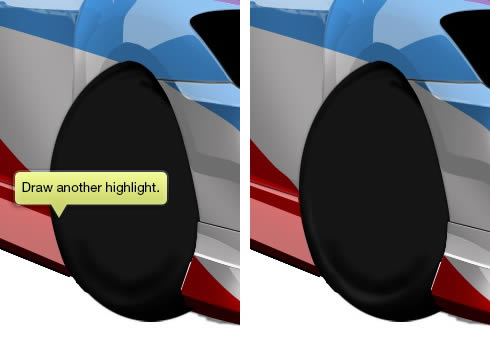
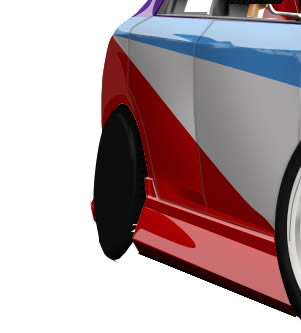
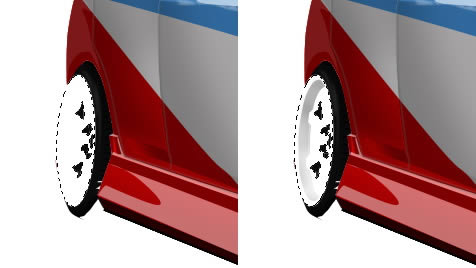
Step 49
Draw another black elliptical shape for its rear tire. Paint some highlights using Brush tool.
Step 50
Draw its rim. Paint shadow to give it three dimentional appearance.
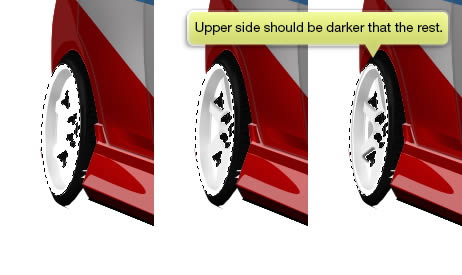
Step 51
Keep painting more details using brush tool. Upper side should be darker than the rest.
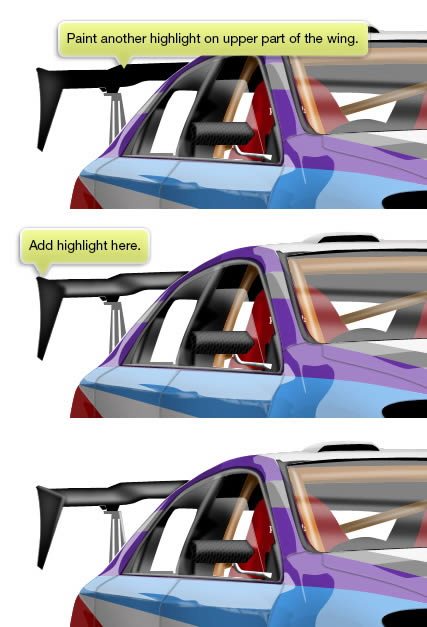
Step 52: Wing
Activate Brush tool and paint wing behind the car. Make new layer and paint its highlight.

Step 53
Draw extra part to attach the wings handle onto the trunk. Manually, draw its handle.

Step 54
Paint another highlight on upper part of the wing.
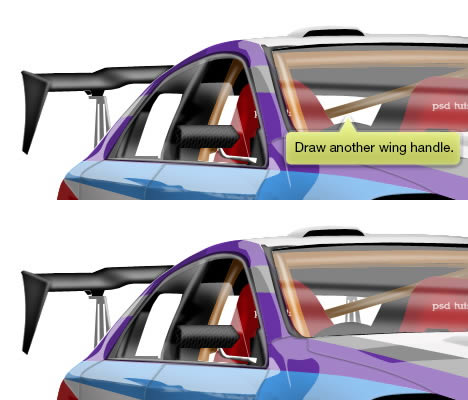
Step 55
Draw another wing handle on the opposite side.
Step 56: Shadow
Make new layer and place underneath other layer. Draw car shadow by applying black under the car. Don’t forget to draw specific parts that are significant, such as wing and rear view mirror.
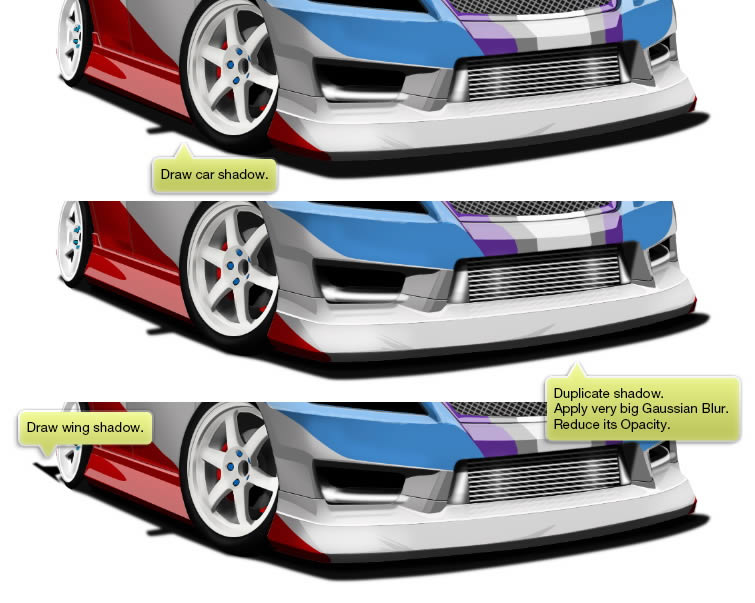
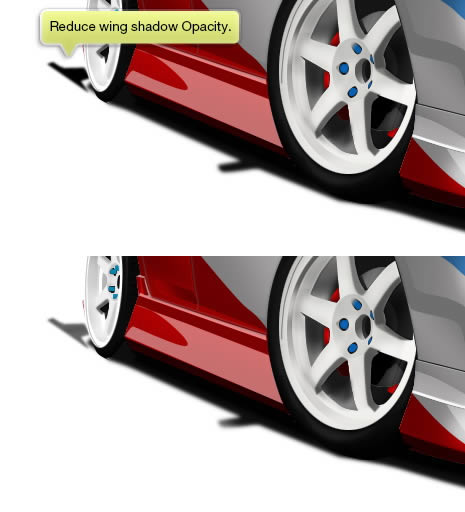
Step 57
Wing is much further than the rest. So we want its shadow to be lighter. We can do this by erasing it using low Opacity Eraser.
Step 58: Intercooler
Draw a grey rectangle inside front bumper. Make new layer and then paint highlight and shadow on indicated areas below.

Step 59
Draw some lines. Use technique explained earlier in Step 33. Draw thinner lines with different direction and place it behind the first lines.

Step 60
Make new layer and paint highlights using low Opacity Brush tool.
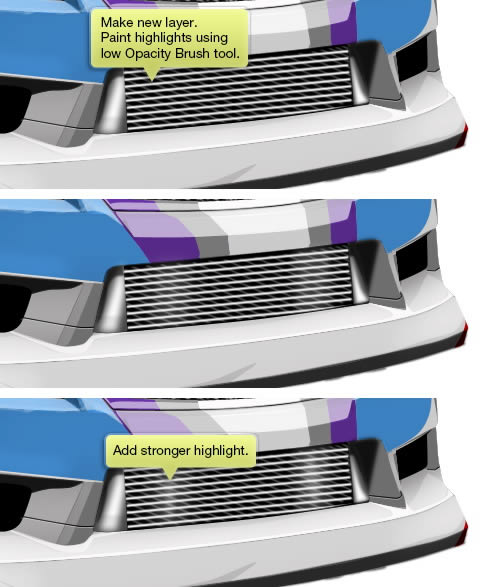
Step 61
Paint shadow on upper part of the intercooler. Draw wire reflection on lower part of the bumper.

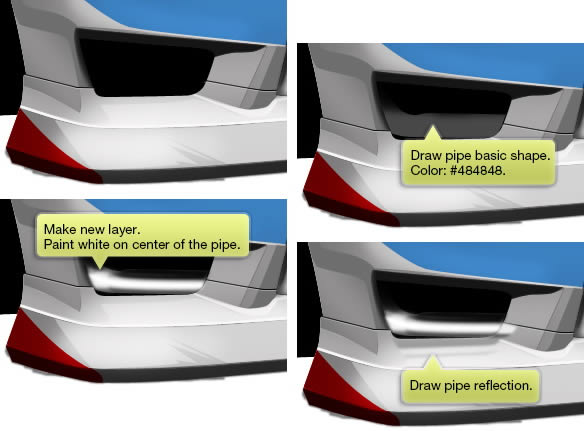
Step 62
Draw a gray pipe on left side of the bumper. Make new layer and paint highlight on center of the pipe. Draw pipe reflection on the bumper surface.
Step 63
Draw another pipe on its opposite side.

Step 64: Tow
Draw a black rectangle and then draw the tow base. Next, draw an omega shape.
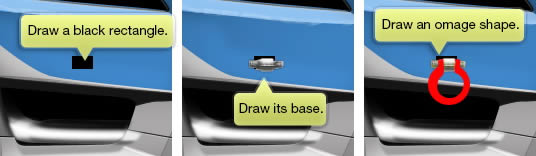
Step 65
Make new layer and then paint shadow on inner side of the tow. For decoration, draw an arrow on its surface.
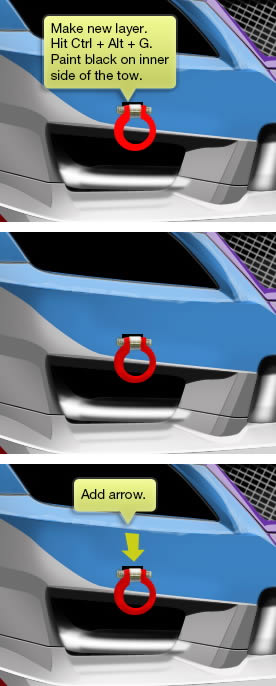
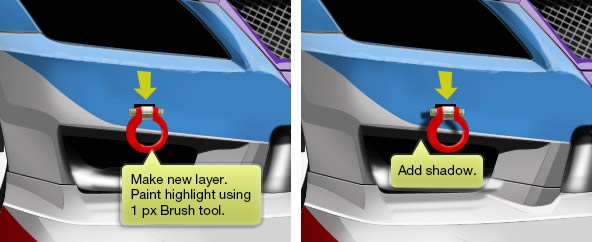
Step 66
Make new layer and then draw highlight on the tow using small brush. Don’t forget to add tow shadow on the bumper behind it.
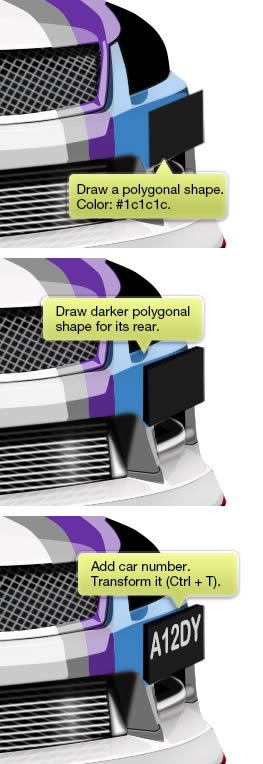
Step 67: Car License Number
Draw a dark polygonal shape and then draw its rear to give a three dimentional appearance. See pictures below for reference. Add car number and then transform it until it matches the plate perspective.
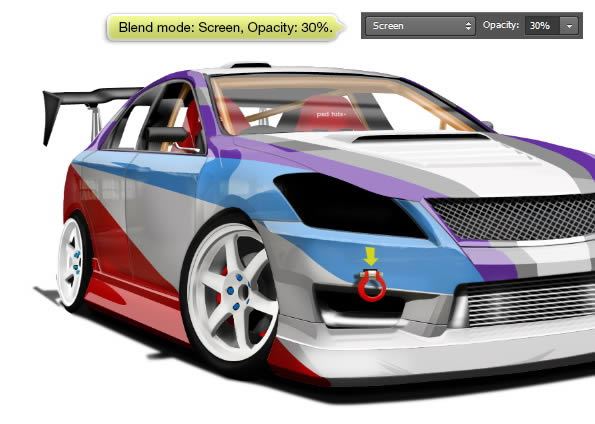
Step 68: Add Reflection
Grab this image from deviantart.

Step 69
Place the image on top of the car. Add layer mask. Hide some of the image by painting it with black using soft Brush.

Change its blend mode to Screen and reduce its Opacity.
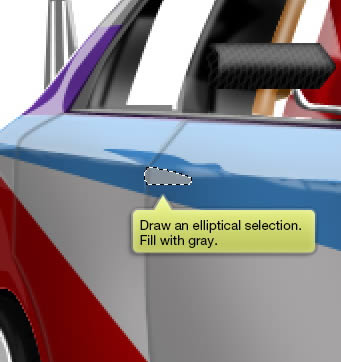
Step 70: Door Handle
Use Ellipse Marquee tool to draw an elliptical selection on the door. Make new layer and fill it with gray.
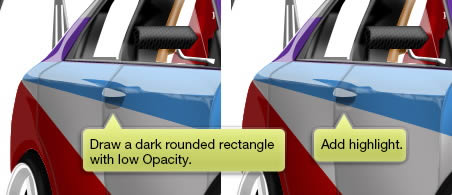
Step 71
Behind the door handle draw a dark rounded rounded rectangle with lower Opacity. Paint highlight on its lower side.
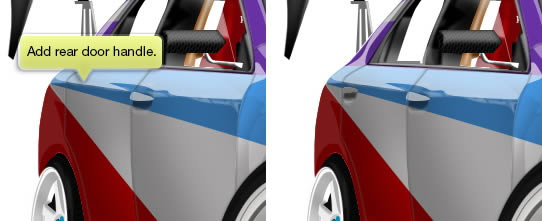
Step 72
Repeat previous step to add rear door handle.
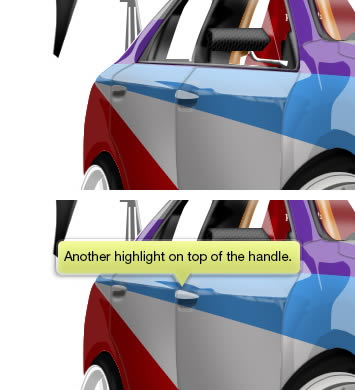
Step 73
Make new layer and paint subtle highlight on top of the handle. Make sure to use small Brush tool with very low Opacity.
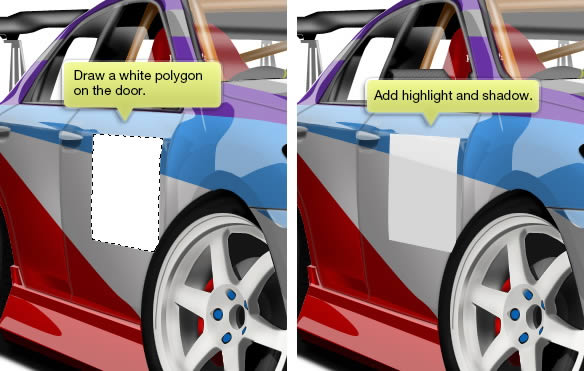
Step 74: Decal
Draw a white polygon and place it on the door. Make new layer, paint highlight and shadow.
Step 75
Add a number. On Layers panel, right click the number layer and select Convert to Shape. We need to do this to freely transform the number. Hit Command/Ctrl + T, right click and Alt-drag its corner to skew the shape until its perspective matches the door. Right click and choose Warp to distort its shape a bit.

Step 76
Reduce text layer Opacity to make it blend with the door surface. Draw tapes on its corners. You can also add logo.

Step 77
Add more decal on the car surface. We use same techniques explained earlier. Make sure to transform it until they match the surface perspective.

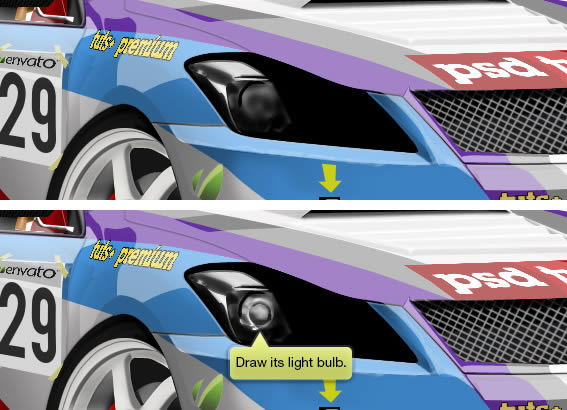
Step 78
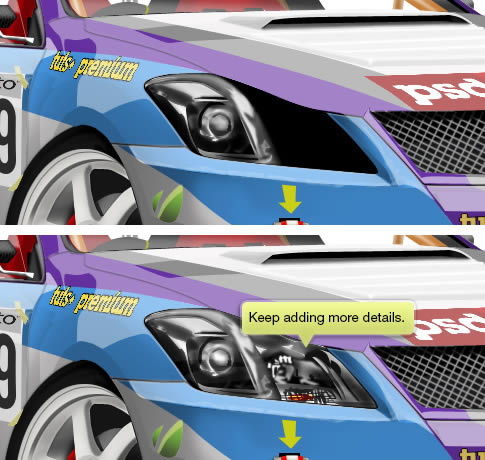
Activate Brush tool with low Opacity and white as its foreground color. Draw some highlight on its side. Remember that our light source is at top roght corner. So, we want its top to be lighter. Paint more details inside the light.

Keep adding more details inside the main light. See pictures below for reference.
Step 79
Use same technique to draw the other light.
Step 80: Floor
Make new layer and place it under all layers. Select the floor using Rectangular Marquee tool and fill it with black.

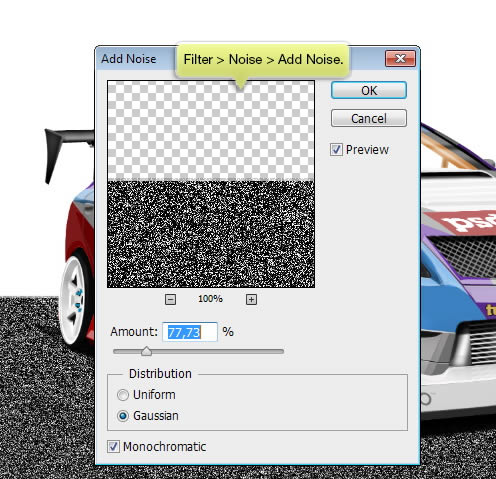
Step 81
Click Filter > Noise > Add Noise. Use big Amount to get much noise inside the floor.
Step 82
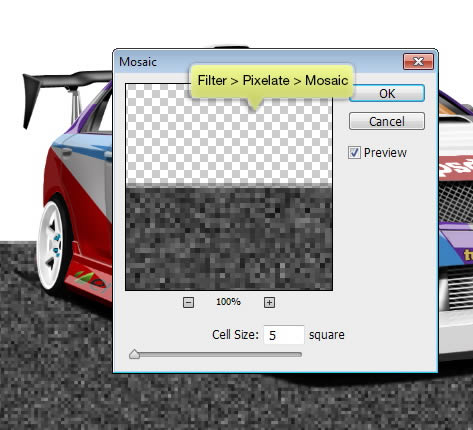
Click Filter > Pixelate > Mosaic.
Step 83
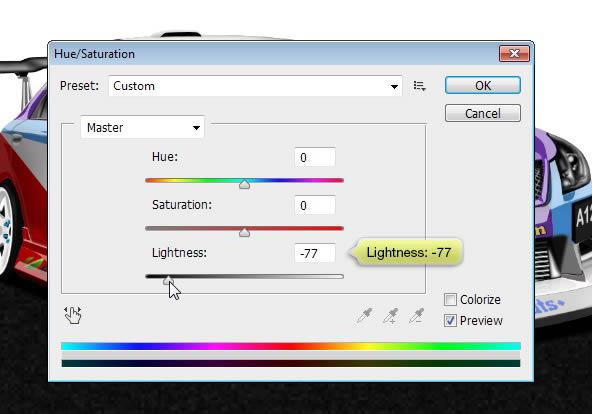
Click Image > Adjustments > Hue/Saturation and reduce its Lightness until the noise gets darker.
Step 84
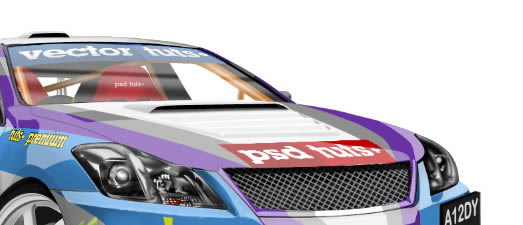
Here’s the car appearance after we darkened its floor.

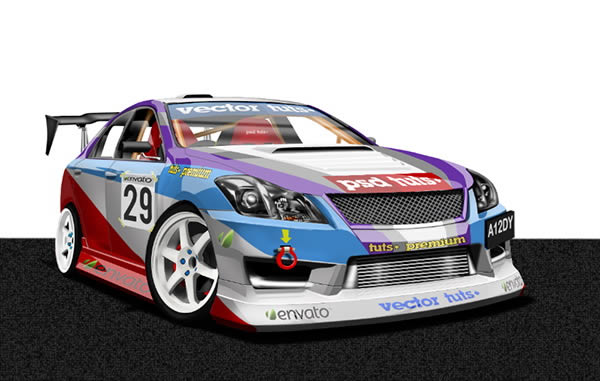
Conclusion
This is the end of the tutorial. As you can see, we are drawing this little by little using only brush tool. The process is fairly simple. Start by drawing the basic shape and then paint highlight and shadow on top of it.
DIGITAL JUICE
No comments:
Post a Comment
Thank's!