In this tutorial we will create the Evil Queen from Snow White and the Seven Dwarves using digital painting techniques in Photoshop. Let’s get started!
Tutorial Assets
The following assets were used during the production of this tutorial.
Step 1
Let’s start creating a new file by going to File > New (Command/Ctrl + N).

In Preset select International Paper and in Size, A4.

Now we have a brand new canvas.

Let’s choose a middle tone for that background in order to make easier to work with lights and shadows. I like this “chocolate”.

Now fill the canvas.

Step 2
The first step is to draw the shape of the bust. For this we are going to the pencil tool.

Select a hard circular pencil shape, 100% opacity, 1% spacing. Select Transfer and apply opacity jitter with pen pressure.

Now click (D) to set the main color to black, imagine where the head is going to be and drop a big black dot there to start the silhouette.

Start drawing the shape as shown below.


And here we have the basic shape of the body and the hood

To create the face, create a shape similar to the image below with the brush tool.

Keep drawing as shown.

Step 3
Now we will start painting the facial forms. With a transparent brush, start painting as shown below.
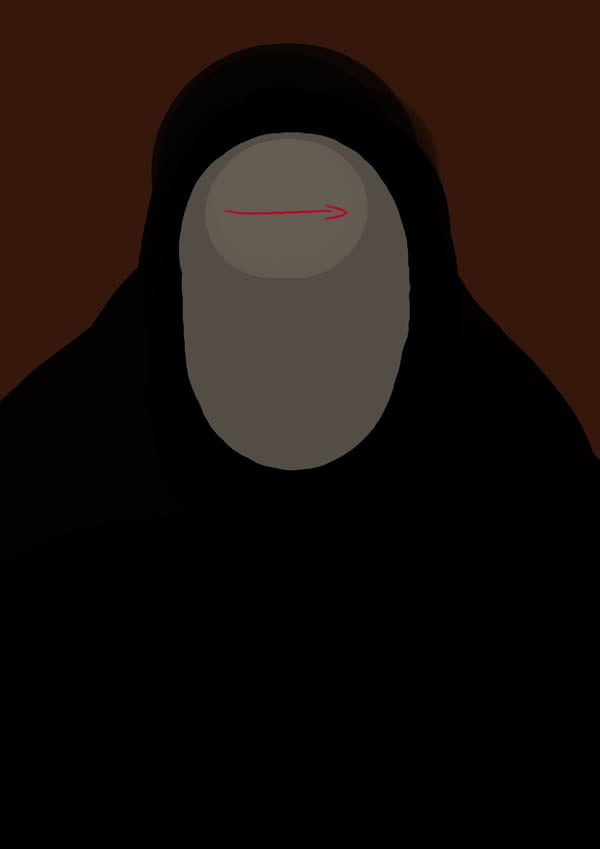
Now, leave a bit of space from the middle of the bottom of the oval and start a stroke going down to have a lovely nose.

For the cheek do as you see here, having in mind that you are drawing those forms under the eyeball hole

Same thing for the jaw and chin, just try to keep the vision of an old woman in your mind and imagine it flaccid.

Step 4
Time to add some facial forms. It’s much more easy to start detailing elements if you can see them in your mind so a good start is to sketch the basic expression lines. This is the first approach to the feelings the drawing will communicate, try to feel the same you want to draw at this point, feel sad if you want to draw sadness and feel angry if you want to draw rage, this way you are calling the visual memories you have in mind about non verbal communication and expressiveness. For this step we will still use the same pencil tool (more or less 85% of the work was done with that tool). Set it at size 10, be sure to have the skin tone as background color and black as main color. Use the black color over the head and the skin color for the outside head elements as the hair. To change from main to secondary color use the key (X). First we are going to draw the hair, flowing down from the middle of the head. Follow the red arrows direction.


Now let’s focus on the nose.

Mouth side wrinkles are very important to say that she is old and have a flaccid facial skin, also adds a lot of expression.

For the old lady’s mouth we need a lipless and toothless mouth that communicates the sensation of the skin directly over the skull bone. A tooth or two may add visual tension and details. Don’t worry if it’s not accurate now, you will perfect it later.

Set brush size to 50 and click (x) to go back to the skin tone color and draw a "V" a bit rotated over her eyebrows as you can see in the image, in order to show the facial muscles and give more tension to the expression. Also with brush size 100 draw a soft line over the nose.

With the eye dropper tool, sample the background color. Then select the pencil tool and using a size of 100 place a dot in the eyes to create the pupils.

Step 5
Now let’s work on her hands. Set your brush size to 600 pixels and place a dot where you think the apple will go.

Using the same color you used for the skin tone, sketch out her hands.

Step 6
Now we will develop the facial forms a bit more. We will start with the eyes. Grab the pencil tool and vary the size between 5 and 35. The small lines are for expression, the bigger lines are for middle tones and highlights.

Keep drawing the wrinkles as shown.

Now start working on the brow.

Now start work on the nose.

Paint in the mouth hole and draw a basic lip in black, to form a basic wrinkly over the mouth. Also draw the cheekbone.

Repeat the same steps on the chin below.

Continue to add detail to the jaw.

Now start to frame in her face by drawing some basic lines for her hair.

Now add some horizontal lines as shown below to start sketching in some wrinkles on her forehead.

Now start work on her eyes. To emphasize them a bit, I dotted her eyes with the background color to darken them up a bit. I then applied three highlights from different light sources. As you can see, it gives the illusion of a skull in her eye to add a bit of symbolism.

Step 7
Not all parts of the body are the same color. Now we will gently paint over different areas to apply some color. Do this very gently. We are painting in a normal layer. A color mode is not applied.

Continue adding color as shown below.

To finish this step just add a bit of desaturated clear blue to the borders of the face.

Step 8 – Don’t forget the hand
Advancing your artwork in a balanced way is important. In this piece, there are two focal points. The eyes and the hand with the apple. While we will add a lot of detail later, it is important to keep the sketch updated to the level of the rest of the face. Add in some more details to the hand and fingers. You can also drop a black dot in the upper area of the apple so it starts looking a bit less like a ball and more like an apple.

Step 9
Create a new layer and use the texture brush to add some detail to the hood.

Use the lines below to paint in the wrinkes of the cloak.

Now use the eye dropper tool to select the clearest and darkest skin tone colors to paint in light and shadow hairs. Use random colors and sizes.

Try to paint them looking as natural and irregular as possible following this scheme. A good tip is to make some strands lay over others looking as strand groups.

Now with brush size between 30 and 15 (as you prefer) paint softly with the “shadow skin” color drawing a half transparent line following this pattern to make it look as a shadow of the hair over the face.

Again with the body, get the background color again with the eyedropper tool (I) and follow these arrows to get the shoulders.

In a new layer, with the “shadow of face” color we previously used, now paint the chest black empty area this way

Try to imagine where the borders of the hood and the long hair (that we will paint later) are over the chest, more or less as you see here.

Paint it following different lines to have a base for future clothes’ wrinkles, and do it changing brush size as much as you need to feel comfortable. More or less I painted it this way.

Step 10
Now that we have the structure for our face laid out, we will now try to add in some detail to make the left witch look like the one on the right.

The blue areas designate highlights.

The red areas designate shadow.

The illustration below will explain what is shown as shadow and highlight.

Feel free to add in some warts as shown. To paint them just drop a dark dot on her face and then paint over it with a clear skin tone.

The boring part of this kind of works is always the same… "INFINITE WRINKLES". Now we have to detail more the ones we sketched before. The way is always the same, get the previous colors used, you know, clear and dark skin tones, is time to work again in lights and shadows but in small parts, not in general areas. Let’s start with the upper area, draw few horizontal big lines from left to right as you see in the image, always between the hair areas and keep a clear space between them, now add some smaller irregular diagonal lines behind the biggest ones, more softly and carefully, do it with the shadow skin tone color and separate them with the clear skin tone color.


This ones are pretty easy, just follow the lines you see in the drawing, from up going down with lines a bit circular that turns to inside, to the center of the face, never outside, except the ones of the down lip, that are the opposite thing, going from inside to outside.

As the previous one this is very easy, just follow the lines of the example image and try to make them a bit irregular, not always parallel, try to paint them fluid and looking organic.

Step 11
Eyebrows are always the same, more or less. The hair always follows the same dynamic but it’s always hard to draw an eyebrow that looks natural, no matter if you want a beautiful or an ugly eyebrow as in this case. Start to draw from the center of the face going outside hair by hair. Draw the hairs going from up to down and always have in mind that those hairs have a different position in each part that you will have to learn. The ones more centered usually are more separated than the rest (well it happens with both extremes of the eyebrow). Few hairs after this they are more or less in straight line from up to down and soon they twist to go each time more and more from up/side to down/center. Paint them with the brush "1" in size 1 or 2, as you wish with pure black ink to generate contrast between the white head hair and the black eyebrows.

When ended they shall look this way.

Hair
Time to paint the long hair. Half of the process will be done with single brush strokes going fluidly from up to down.

But before to do that we will develop a “hair base” quickly, so we are going to create a hair brush. So let’s start creating a new file by going to File > New (Command/Ctrl + N).

In Preset don’t pay attention to the parameters, does not matter much for this step.

Now we have again a white canvas to work over.

Choose again the pencil tool and be sure tou have BLACK as main color (this is important if we want a full opacity brush).

The pencil brush should be a rounded hard brush with no activated dynamics, as you may see here.

Draw 5 separated black dots as you see in the image.

Select a rectangle around the dots as you see in the image.

Go to menu EDIT and click on DEFINE BRUSH PRESET.


Call it “hairbrush” and click OK.

The new brush will be available among the rest of your brushes, select it and if you try a stroke it have to look as this.

Go to Brush window (f5) and activate TRANSFER, choosing PEN PRESSURE as control of opacity jitter

In BRUSH TIP SHAPE modify the spacing to 1% and rotate 90º up left (as you see in the drawing) the angle.

Activate SHAPE DYNAMICS. In SIZE JITTER choose as control PEN PRESSURE and in ANGLE JITTER choose as control DIRECTION.

In BRUSH PRESETS window save it clicking on CREATE NEW BRUSH button, later give it a name (I called it 3 in the provided brushes) and click OK.

The strokes of this new brush should look as the ones of the right side of this image.

As in previous steps get the clear skin tone color with the eyedropper tool and with the new brush IN BRUSH TOOL MODE (This is important, not using the pencil tool, this have to be smooth and the only way is using the brush tool) paint few irregular strokes as you see in the image over the black area we previously left empty for the hair.

Try to follow more or less this wave of lines for the hair.

Now we are going to paint few single hairs to make it look more random and natural so we have to modify the parameters of our first brush. Choose the brush 1 and in BRUSH MENU (f5) activate the SHAPE DYNAMICS with PEN PRESSURE as control of SIZE JITTER

Following the previous steps wave forms paint random single hairs, try to do them as long as possible

Now, with the same brush, we are going to paint small “crazy” hairs, paint them all short and twisty as the red arrows of the image but press hard those are not soft hairs.

The result should look as this.

Step 13
Choose the crop tool and crop as shown below add a bit more area to the canvas.


Step 14
Background is a bit boring already but the whole work idea was "keep it simple" (except the wrinkles and ugly details that make the witch so expressive) so a landscape is not an option. Then a texture could work. Open the file "texture1.png."

Select the whole texture with SELECT ALL (Command/Ctrl+A) then COPY (Command/Ctrl+C), close the texture window and in the witch window click on PASTE (Command/Ctrl+V). Should look like this.

In LAYERS select the texture layer and click on ADD VECTOR MASK.

There will appear a mask layer already selected.

So we just have to paint with black ink over the witch image, trying to be accurate at the edges (no matter what brush you use, it’s more or less a matter of accuracy), to make disappear the texture area that covers the creature. The mask layer have to look as this.

And the drawing should look this way.

Step 15
It’s necessary to enhance the border of the hood and now that the background is darker with the texture, the previously used background color would be enough useful to make a first step of visual contrast with the textured background, so get it with the eyedropper tool (turn invisible the texture layer for more comfortable color capture. In the next step the left example should look as the right one.

The red lines are the work we have to do in this step, but remember they are red for you to view clearly but you have to do it with the background color. The blue lines are the direction you must follow.

Final result should look as this.

Again with the eyedropper get the gray color from the chest (try to get it from the clearest area you must find) and now, following more or less the previous directions pattern, paint "the other area of the wrinkles", the front, always keeping a dark frame between the gray front and the brown (background color) borders, that frame will represent the volume.

We are going to make a simple side light, so in the swatches get the darker of the "reddish" oranges (see the image) and mark a bit harder all the border of the witch shape and the border of the highest wrinkles of the hood, following the direction deimageted in the image.

Work more on the wrinkles.

Our previous shoulder area of the coat was not detailed at all, to make it look as frontal we need to follow the textile wrinkles pattern, so start painting a brown base over the black areas (1º), the brown is the background color we used before. Try to follow the hood wrinkles going down. With the gray we previously used paint the front side of the wrinkles as we did in the top of the hood ( 2º). Finally continue the profile of the shape with the dark orange (3º). While I was profiling with the dark orange I worked the shoulder to make it a bit more rounded.

Same here, paint with the brown background color over the empty black area of the right shoulder

Capture The clearest gray from the chest with the eyedropper if you need to get that color again, but now go to COLOR window (up right in the image) and move the K bar to the left a bit.

This is how I did, to 60%. The idea is to get a clearer version of the gray to make a third light on that shoulder.

Now repeat our previous step with this clear gray in the right shoulder following this direction with the strokes.

Step 16
With the clear skin tone we was using all the time we come back again to the hand. Usually with hands you draw them in a posse and later you dislikes that posse and starts another hand, maybe many times in a drawing, hands are always a battle. I sketched a couple of hands over the previous sketch and this is the position I liked more. A good tip is to follow with the brush the red arrows, paint it with the brush 1, is better for sketching.

Perform the borders of the fingers, nails and wrinkles with the "shadow skin color" we used before (you know, our friend the "eyedropper" is there for us). If you don’t know how to draw well the fingers you could search references through Internet (remember, don’t copy, just took visual reference but develop your own fingers) but a good tip is to have a mirror near you.

To start giving it volume try to do it with non-used colors, this will enhance the depths sensation of the "foreshortening". I modified the apple size and perspective; apple is an important element here, so it will have to be bigger than it was. Start to sketch the Highlights.

Define well the edges and borders of everything here. Being the second focal point (the first are the eyes) and being in the foreground it have to be sharpened. Both, hand and apple.

1º Be accurate with the knuckles wrinkles, do them closer each other. 2º Add an almost black line in the deep areas, for example where the apple joins the hand. 3º Make the highlights strong to enhance the realism in the foreground.

Paint softly with a bit of gray in the bottom of the hand to broken the contrast. Also add a bit of "alive" color to knuckles and nails, you could choose whatever and use it in "color" layer mode or not. I choose a clear ink and used it in normal layer mode, just painting softly.

Bigger nails would look more aggressive and wild so pull them out, just continue painting them outside the previous form. Do them very angular, will look weird.

Finger wrinkles are important in an old lady. Add some of them as the red small lines. Also broken the straight lines of the previous fingers, paint them a bit circular going to inside, looking more "old woman" fingers"

The apple should reflect in the upper areas the refracted light from the clear face of the woman so get a clear gray as our previous light or clearer and paint in the apple upper borders. As you see I changed again the apple perspective to be more obvious of what kind of object it is.

What was the color of the apple of the story? Do you remember? Red? green? yellow? Choose what you want (but red represents more “passion/blood”, as green is more “poison”) and paint the apple as in the right example but with soft rendering.

1º Remember to paint the highlight in the apple. Just drop a dot of white. 2º Reflect the right light (clear gray) over the right side of the fingers as we did in the shoulder.

Step 17
To make more wrinkles in the forehead and looking more natural, paint them as we did before but much closer to each other and moving the hand this way "right, left, right, left…" with a small curve at the beginning of each line.

Paint few irregular hairs, separated, starting from the center of the forehead. ¡Hey, are you noticed that she haves a new down jaw teeth?!

Step 18
Click on the eyedropper tool, get the medium gray of the chest as foreground color and the clear grey we used as 3rd light for background color, now click on the pencil and select the brush "2", now just with the medium gray follow down the chest textile and with the clear grey create more volume in the center of the wrinkles under the jaw.

The shroud/hood is very symmetrical so we are going to break it up letting the textile of the right flow straight down. Just follow the instructions in "Step 15" but also following those red arrows at the right of the hand.

Step 19
Set WHITE as foreground color, choose the texturization brush (2) with the BRUSH TOOL and paint softly a white “aura” as you see below.

Set the layout as OVERLAY, it will look this way.

On LAYERS window (f7) select the layer and click on ADD LAYER MASK

With the mask selected get the classic soft airbrush of Photoshop and paint over the witch with black color. When you paints you don’t see any black there, what you sees is that the overlaid white starts to disappear in the areas you paints. The painted area should be more or less the same that here is in red, this is just a preview.

The layer mask should look now as this.

And the results should look as this (except for the red line and arrows). The aurora should be visible in the arrows area, not inside the line where the witch face is.

Step 20
In this step I contrasted a bit the chest area separating it more of the hair, a bit of black airbrush sofly in the hair edges and a bit of clear gray over the chest, letting enter more light there.

Here I added a bit of contrast to the nose and few white dot’s to simulate the old skin

Step 21
Previously we set an orange light coming from the left that affects to the hood, now we should make it affect to the face and hair. Get that orange we took before and try to visualize the face in volume, painting with orange the areas of the face that had to be affected by that side light.

Do the same with the hand and the apple

Step 22
Get the texturization brush (2), if used softly it should look a bit as the classic airbrush but a bit more noisy and irregular, making some areas richful. With it and with black color paint softly the areas marked below as red, the separation between the lower hair and the face and neck. Later with white and a very small brush shize paint lot of white dots in the areas marked below in blue, this will raise the volume and will add texture.

This is how it should look now.

Step 23 – Apple
Create a new layer and set it in SOFT LIGHT, get the rounded brush 1 with a very small size and the colors black and white. We are going to paint the small spots of the apple skin. First with a very very small brush size press hard with the pen painting a hard small dot, then modify the brush size making it bigger and paint over the previous spot but very very softly, painting like a small “aura” of each dot. Repeat it randomly few times with black and white. Also with black paint a small tail going out from the hole.

With clear orange paint very very softly over those dots to make the apple more alive. Do it with the texturizer brush (2) or with the classic airbrush

To be at the same volume level I worked a bit more on the hand, I did harder the 3rd orange light, added dark midtones to the bottom of the hand and added some white highlights to the finger wrinkles.

Step 24
With clear gray paint few strokes on the chest, few of them randomly and few of them following any wrinkle.

Paint softly more of this in the right section of the hood, with middle tones of gray in the frontal areas and with the clear gray in the side areas. Draw also few holes with a dark gray near to black and add with clear gray the “pending” part under the hole.

Now with the left side and the clear orange, follow the arrows dynamic.

Add more of them in both sides tryng to emphatize the volume. The blue arrows are for the clear orange and the red arrows are por the middle and clear gray

After and before.

Step 25
Well, we are going to draw few trees. With the pencil tool get the brush 1, open the brush window (f5) and let only active SHAPE DYNAMICS in order to be able to paint branches from thin to fat.

The branches should look this way.

Start drawing an irregular line a bit thinner on the top and fat at the bottom, draw it from up to down and from the center to the border. Try to be as irregular as possible.

Those irregularities will be the base for new sub-branches.
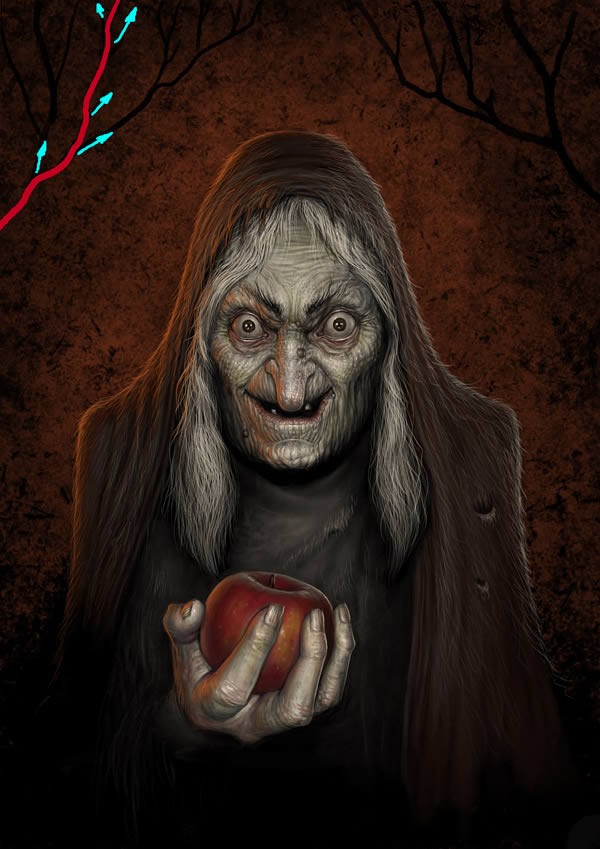
Do the new branches as we did in the first one, joining it.
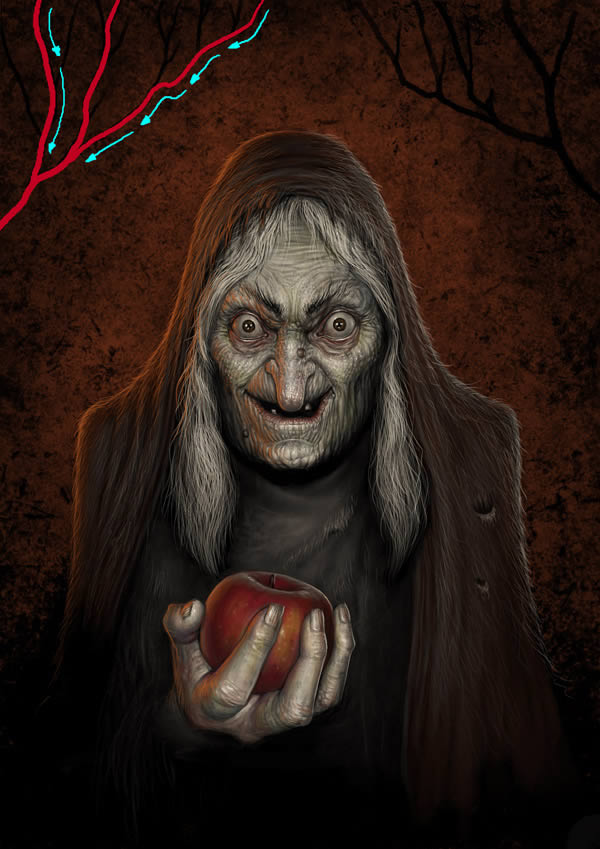
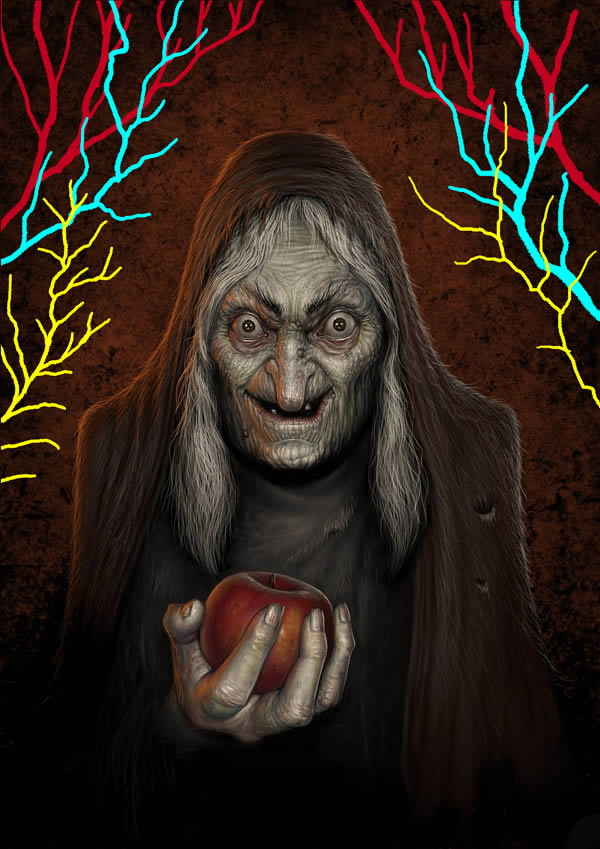
Add them few terminations until you will be pleased with the results.

Repeat the process in left and right few times until it looks as an “illustration” forest borders.
Step 26
With the brush tool (B) get the supplied brush 4, this is a custom brush I made to develop fern.

If you press softly and add pressure smoothly in the same stroke you will do something as this.
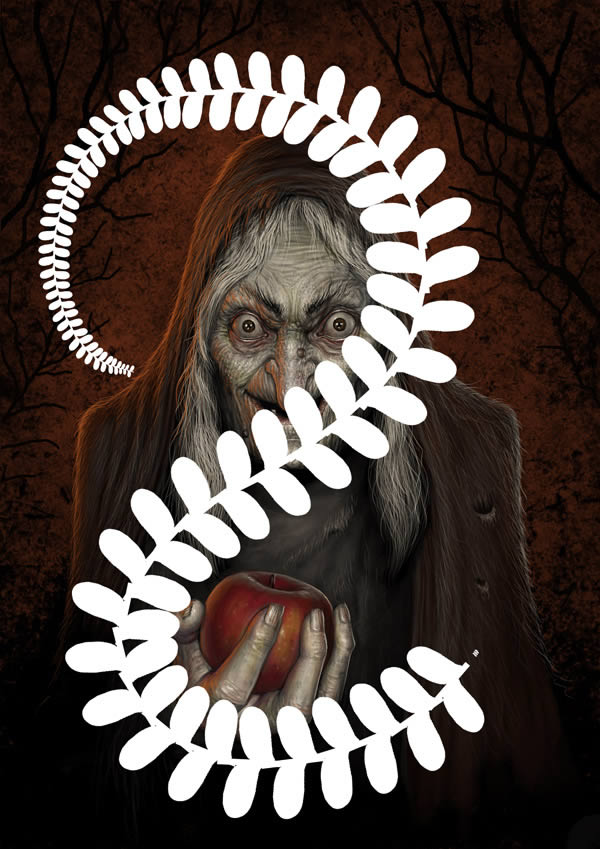
Try it few times in the sides as you can see here, but not in white obviously.
It should look as this.

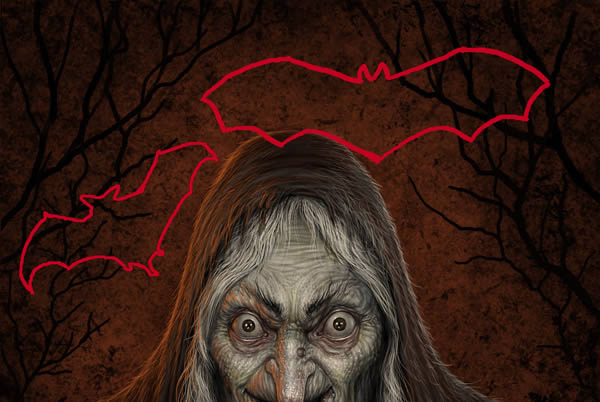
Step 27
Well, that background is hard to be considered as a "sky" but our mind is a magical instrument and only need a reference, as a bird, for example, to transform a texture in to a landscape, so we are going to draw a couple of bats. You don’t need to be very natural and accurate on this, they may even be just sketched basically and works the same. My bat was those, I started a line work in red trying to imagine a couple of bats with forms I like.
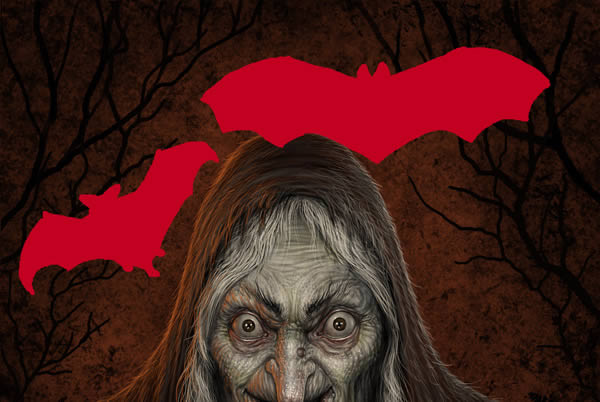
Step 28
As I used the pencil there is no smoothness in the borders so you can use the paint bucket tool (G) to have a flat shape of the bats.
Step 29
If you have them in separate layers, with each of them go to LAYERS in the menu and click DUPLICATE LAYER few times, then start to get each layer and with Command/Ctrl+T (FREE TRANSFORM) scale, rotate and distort them to look as in different positions and distances.
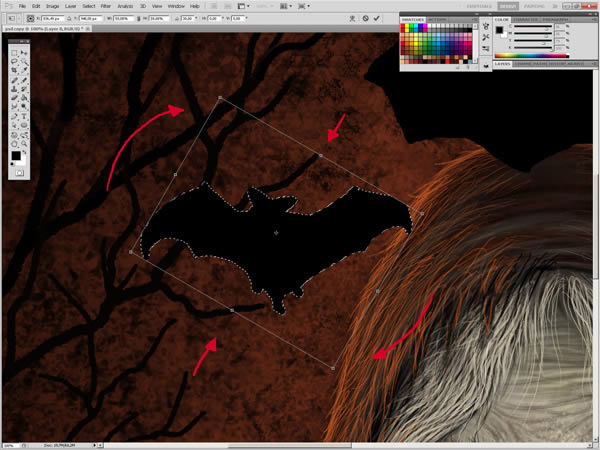
Should look near to this.

Step 30
With the texturization brush (but adding at the end a Gaussian blur) or with the classic Photoshop airbrush, with black ink, paint very softly over the upper borders as in the image, to give a bit of depth and emphasize the main focal point.

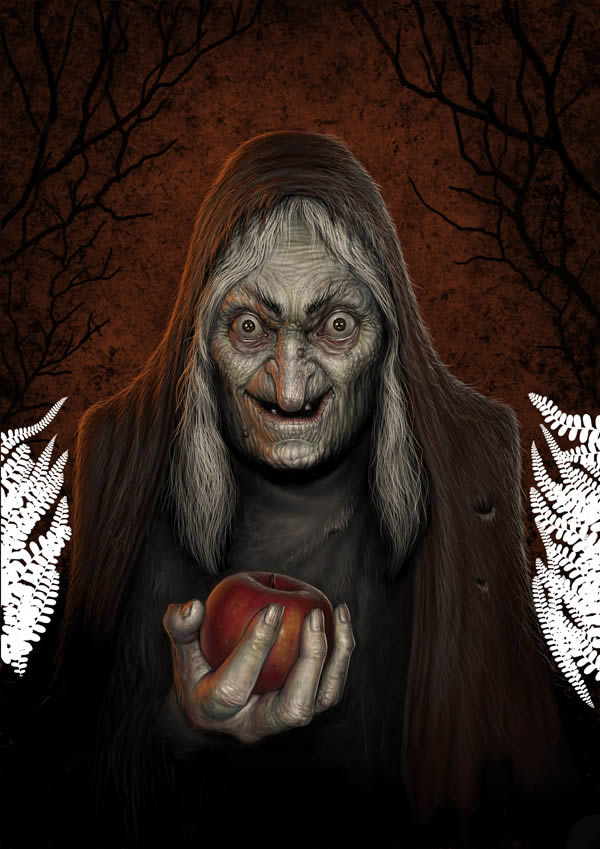
Final Image

DIGITAL JUICE
No comments:
Post a Comment
Thank's!